Food in Jars (34 page)
Authors: Marisa McClellan
¼ cup/7 g fresh rosemary leaves
1 cup/190 g finely milled sea salt
Preheat the oven to 200°F/95°C (or lower if you have that option on your oven).
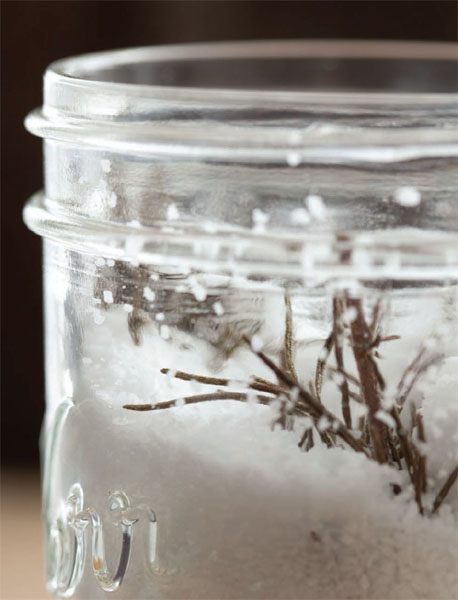
Finely mince the rosemary leaves and combine them in a bowl with the salt. Use your fingertips to rub the rosemary into the salt. Spread the salt mixture on a foil-lined rimmed baking sheet and bake until you can smell the rosemary and the salt feels dry to the touch, about 20 minutes. Remove the pan from the oven and let the salt cool at room temperature. When the salt is cool, break up any chunks that may have formed and pour it into 2 half-pint/250 ml jars. Store in a cool, dark place. It keeps indefinitely, though flavor will diminish after months on the shelf.


C
ULTURED BUTTER IS MADE FROM CREAM THAT HAS
been doctored with beneficial bacteria and allowed to sit at room temperature until it becomes thick and tangy. It used to be that all butter was made from cream that was slightly soured like this, as it frequently took several rounds of milking to gather enough cream to justify a churning session. As refrigeration became widely accessible, it was easier to keep cream from souring and the traditional butter-making techniques were abandoned. In recent years, cultured butter has been rediscovered and is now a specialty item that can cost upwards of $8 a pound.
1 pint/480 ml heavy cream
2 tablespoons buttermilk
¼ teaspoon fine sea salt
Combine the cream and buttermilk in a jar or bowl and stir until blended. Cover with a tea towel or a piece of cheesecloth and allow it to sit at room temperature for 18 to 36 hours, until it becomes thick and tangy. At this point, you can keep your cultured cream in the refrigerator up to 1 week before you make the butter.
When you're ready to make the butter, pour the thickened cream into the bowl of a food processor. Process until the cream has separated into clumps of butter swimming in liquid, about 2 to 5 minutes.
Place a fine-mesh sieve over a bowl and pour the contents of the food processor bowl through the sieve. Make sure to save the buttermilk you've just created; it's incredibly flavorful and can be used in any recipe that calls for buttermilk.
Using the back of a rubber or silicone spatula, gently move and scrape the butter in the sieve to help remove more of the buttermilk. You will find that a bit of butter pushes through the sieve. Just scrape it off the bottom and plop it back into the sieve.
After you've worked most of the visible buttermilk into the bowl, set the bowl aside. Rinse the butter in the sieve with the coldest water your tap can produce while folding and pressing the butter. The goal is to remove as much of the buttermilk as possible. The more buttermilk you can remove, the longer the shelf life of the butter will be.
After several rinses, place the butter in a shallow bowl and continue to press and
fold the butter, still attempting to work any remaining liquid out of the butter. When you feel like the butter has given up as much liquid as it's going to, sprinkle in the sea salt. Mix it into the butter thoroughly with the spatula. In addition to the flavor boost the salt gives, it also extends the shelf life of the butter.
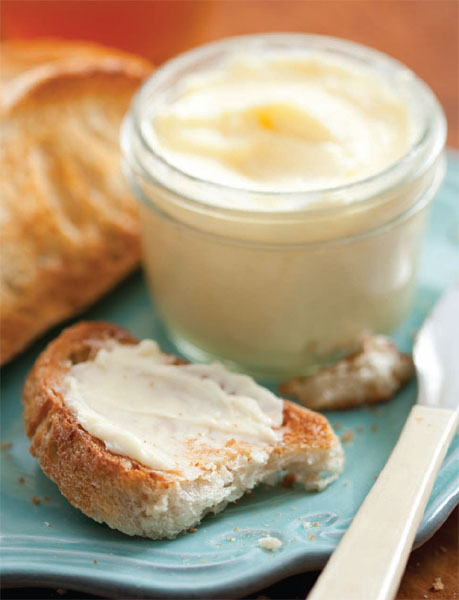
Pack your homemade butter into a wide-mouth half-pint/250 ml jar and store in the refrigerator. It will keep up to 1 week.

R
EAL VANILLA EXTRACT SHOWS UP IN AT LEAST 75
percent of my baking projects. I also like to pour a generous slug into pancake batter and sometimes I make my own honey-sweetened vanilla yogurt. How is it that I'm so free with such a precious commodity? Simple. I make it myself, using bottles of inexpensive vodka and masses of vanilla beans that I buy by the pound online.
1 (750 ml) bottle vodka
24 vanilla beans
Pour ½ cup/120 ml vodka from the bottle and reserve.
Split all the vanilla beans and scrape the vanilla seeds from the beans. Using a narrow funnel, push all the vanilla seeds into the bottle of vodka. Cap and shake to distribute. Remove the cap and add the scraped vanilla bean pods to the bottle. Top off the bottle with the reserved vodka (if it all won't quite fit, make yourself a cocktail!) and cap once more. Stash the bottle in a cool, dark place and let it infuse and mellow for 4 to 6 months. You know it's done when the vodka is dark, nearly syrupy, and fragrant with the scent of vanilla. If you have the guts to drink it straight, it should be fairly smooth and deeply vanilla flavored.
If you're keeping the vanilla extract for home use, you can decant some into a smaller bottle for use and then top the bottle off with vodka and vanilla beans to create a bottle of perpetually refreshing extract. If you're making it to give as gifts, you can divide it between smaller jars or bottles (making sure to include at least one or two fresh beans with every gift portion).

I
FIRMLY BELIEVE THAT CHICKEN WINGS AND FEET
make the very best stock, but you can use whatever chicken parts you've got.
3 pounds/1.4 kg chicken parts
3 large carrots, coarsely chopped
1 large onion, quartered
3 celery ribs, coarsely chopped
1 sprig rosemary
1 bay leaf
½ teaspoon black peppercorns
6 garlic cloves, smashed
Combine all ingredients in the largest pot you have. Cover with 6 quarts/5.7 liters cold water and bring to a boil. Reduce the heat and simmer, uncovered, for 4 to 6 hours, adding more water as necessary to ensure that all chicken parts and vegetables remain submerged. Stock is done when it has taken on a deep, golden hue.
Position a large strainer over another pot and strain the stock. Discard the solids in the strainer.
Return the stock to the heat and bring to a boil. Continue cooking over medium-high heat until the stock has reduced to approximately 3 to 4 quarts/2.8 to 3.8 liters of concentrated stock, approximately 30 to 45 minutes. Pour the stock into any size jars you prefer (I like to have both pints and quarts, as they're both useful), leaving 1 inch/2.5 cm of headroom for the 1-pint/500 ml jars and 2 inches/5 cm for the 1-quart/1 liter jars. Freeze.
When it comes time to use the stock, remove the layer of fat from the surface of the frozen stock before allowing it to defrost.

V
EGETABLE STOCK IS A GOOD PANTRY STAPLE, PAR
ticularly if you have family members who avoid meat. A couple quarts of homemade veg stock means you're never far away from easy soups and stews.
1 pound/455 g button or cremini mushrooms
4 large carrots, coarsely chopped
1 large onion, quartered
2 leeks, washed well and coarsely chopped
3 celery ribs, coarsely chopped
1 bunch parsley
1 sprig rosemary
1 bay leaf
½ teaspoon black peppercorns
6 garlic cloves, smashed
Combine all ingredients in the largest pot you have. Cover with 6 quarts/5.7 liters cold water and bring to a boil. Reduce the heat and simmer, uncovered, for 4 to 6 hours, adding water as necessary to ensure that all the vegetables remain submerged. Stock is done when the liquid is deeply colored and the vegetables look spent.
Position a large strainer over another pot and strain the stock. Discard the solids in the strainer.
Return the stock to the heat and bring to a boil. Continue cooking over medium-high heat until the stock is reduced to approximately 3 to 4 quarts/2.8 to 3.8 liters of concentrated stock. Pour into any size jars you prefer (I like to have both pints and quarts, as they're both useful), leaving 1 inch/2.5 cm of headroom for the 1-pint/500 ml jars and 2 inches/5 cm for the 1-quart/1 liter jars. Freeze.
I know a number of people who have been moving away from
using plastic for food storage in recent days. Whether it's out of concern over BPA or simply out of a desire to steer away from petroleum-based products, glass canning jars can be a good alternative to the traditional plastic freezer bags and containers.