Sew Fast Sew Easy: All You Need to Know When You Start to Sew (12 page)
Read Sew Fast Sew Easy: All You Need to Know When You Start to Sew Online
Authors: Elissa K. Meyrich
LAYOUT OPTION 1 (for either 45- or 60-inch-wide fabrics)
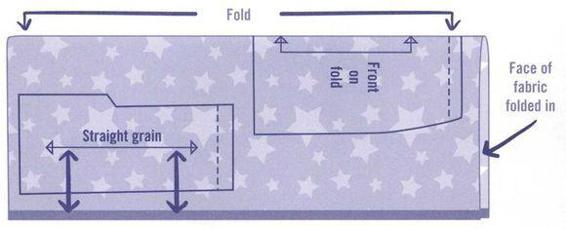
LAYOUT OPTION 2 (for 60-inch-wide fabrics)
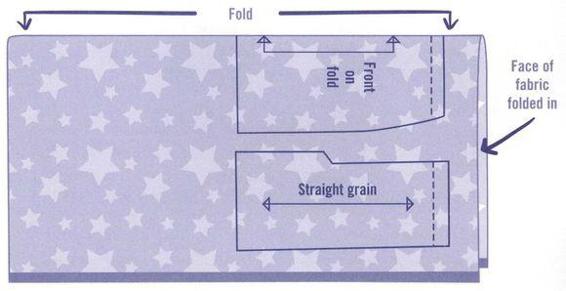
This is the only time the skirt is cut opposite the length of the fabric.
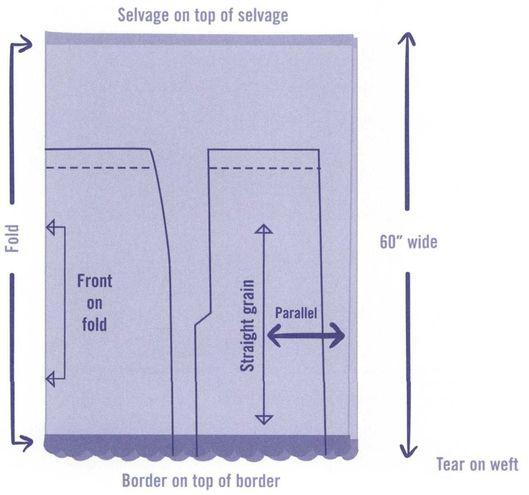
LAYOUT OPTION 3 (for border prints, lace with scallop edging, and selvage-to-selvage stripes)
Now
, cut out the pattern pieces (remember the
Cutting Rules
). These are the notches to clip on your skirt pattern (Rule 9):
 Center front (at top of skirt only)
 Center back at the waistline
 Center back seam
 Hip
Hip
 Lower side seam (for long skirt only)
 Extension for the slit at the bottom back of the skirt
Step 1: Method of assembly
Unpin and remove the skirt back paper pattern and then flip the skirt. The reason for this is that when you are sewing, you always want the bulk of the fabric to the left of the needle.
UNPIN PATTERN PAPER AND FLIP SKIRT
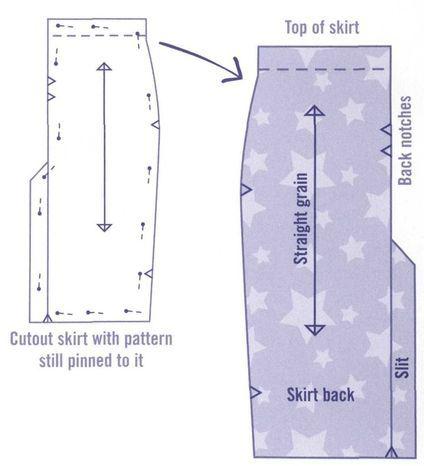
Step 2: Sew backs together
Now place a few pins to hold the two backs together along the center back of the skirt. Make sure to match the center back “notches” you clipped. Remember you will sew the center back only to the slit.
Place a mark with chalk for your “sew stopping point
.” Sew this seam first on a normal stitch length such as 2.5 starting at the top and ending at the stop point.
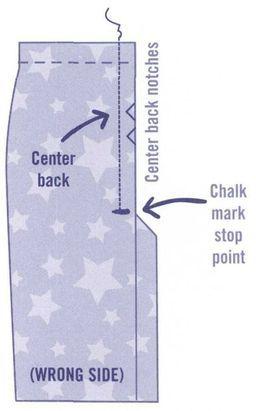
Step 3: Open back of skirt
Open the back of the skirt (after you have sewn the center backs together) and lay it on the table with the fabric
faceup
.
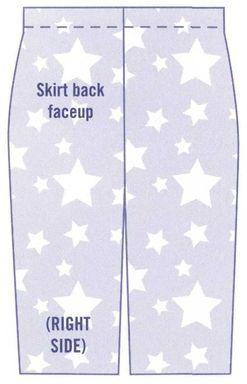
Step 4: Lay front on back
Unpin the pattern piece from the skirt front. Lay the front of the skirt on top of the skirt back,
facedown
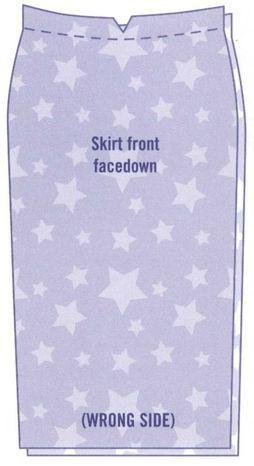
. (Remember, you will sew your skirt together on the wrong side of the fabric.)
