The Baking Answer Book (25 page)
Read The Baking Answer Book Online
Authors: Lauren Chattman
Tags: #Cooking, #Methods, #Baking, #Reference
Q
My spice cookie dough has a similar consistency to the butter cookie dough recommended by the cookie press manufacturer. Can I use a favorite drop cookie dough in a cookie press?
A
Yes, with two caveats. Any room-temperature butter cookie dough, adjusted to pipeable consistency with the addition of some milk or flour, can be used in the cookie press. The operative word is “butter.” Don’t use dough made with vegetable shortening, because it will always be too soft to release cleanly from the plate. Also avoid recipes with chunky ingredients in favor of smooth doughs. Obviously, raisins, coarsely chopped nuts, and chocolate chips will block the openings of the plate, causing the dough to extrude in a misshapen way. Even shredded coconut and rolled oats, which might sneak through the openings, are chunky enough to make a clean design impossible. If you want chocolate in your spritz cookies, use a dough made with cocoa powder. Or you can embellish the pressed cookie dough with dried fruit or whole or halved nuts before baking the cookies.
Q
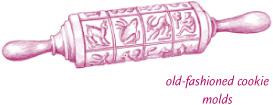
I just bought some old-fashioned cookie molds. Any hints on using these successfully?
A
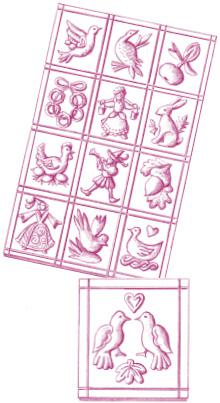
Springerle, traditional German cookies flavored with anise, are tricky to make but worth the effort, especially during the Christmas season, when they can do double duty as tree decorations. To get the most precise impressions, flour the mold before each use. If your mold is large, with multiple impressions, roll out your dough on a lightly floured surface, press the mold firmly into the dough, and then use a sharp paring knife or pizza wheel to cut the dough apart into individual cookies at the pattern edges.
If you are using a smaller mold, the technique is different. Through trial and error, figure out how much dough your mold will hold. Then, measure or weigh portions of dough so each of your subsequent cookies will be the same size. Use the palm of your hand to press the dough into a ¼-inch-thick piece, the same size and shape as your mold; then press the dough into the mold with your fingertips, being sure it is making complete contact with the mold. Run a rolling pin over the dough to smooth out the back of the cookie. Release the cookie by tapping one side of the mold against the countertop. Don’t be discouraged if your first few attempts don’t take. These molds tend to release the dough more easily after they’ve been seasoned by use.


Individual molds make the best impressions on the dough, but for ease of use a carved springerle rolling pin can’t be beat. The shaft of the pin is embossed with symbols separated by parallel grooves. To use the pin, roll it firmly over your rolled dough and then use a pizza cutter or sharp paring knife to
separate the cookies from each other. To buy molds and springerle rolling pins, see Resources.
Traditional springerle recipes will direct you to air-dry the cookies overnight at room temperature before baking, to set the image in the dough. But you can use other dough in these molds. Any rolled cookie dough that holds its shape during baking will work, and the cookies can be baked immediately after molding.
Q
Do you need a pastry bag to make meringue cookies?
A
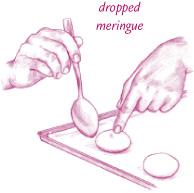
Although professional pastry chefs use a pastry bag for beautifully shaped meringue cookies, it is easier for bakers not skilled in piping to just drop spoonfuls of meringue batter onto parchmentlined baking sheets. Not only is the drop method familiar and simple, but there is less of a chance of applying so much pressure to the bag that you deflate the meringue. Of course, dropped meringues look less neat than piped ones, but you can neaten them into cone shapes by moistening a finger with water and gently shaping each meringue mound into a peak. If you are going to use a pastry bag, use a large (½-inch) tip. Squeezing the meringue through a smaller tip will deflate the batter.

Q
Why do meringue cookies bake at such a low temperature?
A
Meringues are generally baked at a low temperature (about 250°F [120°C]) so they can dry out completely on the inside before they brown on the outside. A long stretch in a low oven accomplishes this, whereas a brief period in a hotter oven would result in cookies that are browned on the outside but underdone on the inside.
Q
How can I prevent the sugary fillings in my filled cookies from leaking out of the cookies and burning during baking?
A
Cookies filled with jam, puréed dried fruits, chocolate, and other soft, sweet ingredients can get messy when baked. Take care when filling rugelach, elephant ears, mini strudel cookies, and the like, to use fillings in moderation. Overfilling is a sure way to cause leakage. Also, while you want to roll up the cookies tightly, you don’t want to roll them so tightly that there’s no room for the fillings to expand a little in the heat of the oven. Chilling the cookies for 30 minutes in the refrigerator or freezer will help them to keep their shape as they bake, and hold in fillings that would otherwise ooze out. But some oozing is to be expected, and can cause a mess on your baking sheets if you don’t prepare. Always bake these cookies on parchment paper, so you don’t have to scrape sticky cookies and burned sugar from your baking sheets.
Q
What is the best way to prevent my dough from sticking to the counter as I’m rolling and cutting?
A
Different bakers prefer different methods. Mix and match from the following steps to find your perfect recipe for effortless rolling.
Rolling Techniques
Chill your dough.
Cold dough is less likely to stick than warm dough. Dough should be cold to the touch, but not so cold that it is difficult to roll or that it cracks under the pressure of the rolling pin. The right consistency is yielding but not squishy. If you are rolling out a large quantity of dough, cut it into pieces, refrigerating all but the piece you are rolling at the moment. If the piece you are working on gets too soft and sticky to roll, use an offset spatula to loosen it from the counter, slide it onto a rimless baking sheet, and refrigerate it for 5 or 10 minutes until it is workable again. Gently press the scraps together, wrap in plastic, and refrigerate them until they are chilled enough to roll out again.
Choose and prepare the rolling surface.
I’m lucky to have a marble countertop in my kitchen. Its surface stays nice and cool, keeping my cookie and pie dough from warming as I work. Still, I make sure to flour it adequately and often during rolling to prevent sticking. If your counter seems sticky, you might try spreading a pastry cloth (see Resources) over your rolling surface, which
will prevent a lot of sticking. Make sure to flour the pastry cloth as you would the countertop. Most recipes will instruct you to flour your work surface “lightly,” but no matter what kind of surface you are working on, don’t skimp on the flour or it won’t do its job.
Prepare the rolling pin.
I dust my wooden rolling pin with flour before and during rolling. Some bakers swear by a cotton rolling pin cover (see Resources), which rolls over dough without sticking. A refrigerated marble or metal rolling pin will help keep dough cool during rolling. Silicone-coated rolling pins resist sticking.
Lift and turn the dough.
Use a large offset spatula to loosen the dough from the rolling surface after every half dozen rolls, and then gently lift and turn the dough 90 degrees before rolling again. If you roll your dough without turning it, the repeated pressure of the pin will cause it to stick to the counter. Similarly, sometimes the pressure of a cookie cutter will cause the edges of cookie dough to stick to the counter, after which you may tear the cookies when transferring them to the baking sheet. To avoid this, loosen cut cookies from the work surface with the same offset spatula.