The Essential Book of Fermentation (49 page)
Read The Essential Book of Fermentation Online
Authors: Jeff Cox
2 tablespoons honey
1.
Pour the commercial jun into a quart canning jar, cover with a piece of paper towel, and screw down the towel with the canning band but not the lid. Set aside in a dark, cool, airy place for 3 to 4 weeks. At the end of this time, a mother should have formed on the jun.
2.
Boil the tea bags in the quart of filtered water in a Pyrex or stainless-steel pot for 5 minutes. Remove from the heat and stir in the honey. Allow the liquid to cool to room temperature. That’s important. You’ll kill the jun mother if you put it into hot liquid. Remove the tea bags and pour the liquid into a brewing vessel of glass, ceramic, or stainless steel.
3.
Transfer the jun mother to the brewing vessel and cover with a clean, tightly woven dish towel clamped to the sides of the vessel with a rubber band, string, or what have you.
4.
Process exactly for kombucha, tasting after 5 to 7 days—but jun may take a bit longer to become tangy and slightly sweet, since it’s a different mix of bacteria and yeast than kombucha’s. You may play gongs for the jun mother if you wish, or simply sing it a lullaby. If you have Indian ragas on your iPod, they might be most appropriate. When the jun tastes just right, add a little sweetness so the end product is fizzy. Fruit juice is best, but be restrained—just a tablespoon or two of sweet juice. Too much sweetness means exploding bottles. A few drops of St. Germain elderflower liqueur in each pint would be a nice finish.
5.
After it has sat capped for 4 days on the kitchen counter, put the jun into the fridge and drink as necessary. Enjoy the jing.
Kombucha Marinade for Chicken

So you’ve made too much kombucha and feel rushed to drink it, or you’ve overfermented a batch and it’s really vinegary. What to do? Well, you can preserve its nutritive components and enzymes by using it as a marinade.
Serves 2 or 4
1 thumb fresh ginger, grated
Juice of 1 lemon
1 tablespoon tamari
¼ teaspoon toasted sesame oil
1 teaspoon honey
1 peeled garlic clove
Dash of Sriracha sauce
2 cups fermented kombucha, the culture removed
4 skinless, boneless chicken parts of your choice
1.
Place all the ingredients except the kombucha and chicken in a blender and whiz until a thick, homogenous sauce forms.
2.
Pour this sauce into the kombucha and stir to mix well.
3.
Place the chicken parts in a 1-gallon zip-top freezer bag and add the kombucha marinade.
4.
Exclude as much air from the bag as possible and zip it closed. Place the bag in a bowl in the refrigerator for 3 to 8 hours.
5.
Take the chicken from the bag, discard the marinade, and cook the pieces any way you wish. I like baking chicken loosely covered with a piece of aluminum foil at 350ºF for 50 to 60 minutes, until cooked through, removing the foil at 45 minutes.
Make Your Own Wine at Home
Making wine is one of those fascinating subjects that goes as deep as you care to go. You start by crushing a few grapes and the next thing you know, you’re arguing about the effect of pH on the amount of sulfites needed in the must.
Well, forget all that. Like baseball, it’s a simple game (you throw the ball, you bat the ball, you catch the ball), even if the rulebook is the size of the Manhattan telephone book. You can make 5 gallons of quite acceptable wine at home with just a little equipment and know-how.
There are wine-and beermaking shops in most large towns, or buy mail-order from one of the many firms with websites accessed by the keywords “home winemaking.” And boy, do I have a book for you.
From Vines to Wines
by yours truly will hold your hand through the entire process from choosing a vineyard site to storing the bottled wines.
You’ll need:
- A 7-or 8-gallon vitreous crock or food-grade plastic can, either of which should be scrupulously clean
- A clean cotton hand towel, tightly woven
- A 5-gallon carboy (like those used to hold water for water coolers)
- A rubber stopper with a hole in the center that fits the opening in the carboy
- Several clean gallon jugs with 1-hole stoppers to fit their openings
- As many airlocks as you have stoppers
- About 10 feet of ½-inch clear plastic hose used for siphoning
- A large funnel and a mesh plastic bag
- 2 cases (24) absolutely clean wine bottles
- A hand-corking machine and a few dozen corks
- A packet of Campden tablets (sulfites in premeasured form)
- A packet of wine yeast (preferably Prix de Mousse or Champagne yeast)
- 60 to 70 pounds of the sweetest, freshest red grapes you can find, preferably picked from the vine the day you crush them (Avoid Concord, unless you like Mogen David. Seedless table grapes make characterless wine. Look for grapes that have a rich, fruity flavor.)
Place the grapes in the crock or plastic can and pull as many as you can off their stems. Discard the stems. A few stems left in the crock won’t hurt. Either tromp the grapes with your (very clean) feet or simply squeeze them with your hands. When they are reduced to a soupy mass and almost all the grape berries are broken open, cover the crock with a clean hand towel and set a board or tray on it to hold the cloth tautly across the top. About 24 hours later, add the correct amount of Campden tablets according to the label directions. Usually they are measured 1 tablet to a gallon. Crush them in ½ cup of warm water until they dissolve, then stir them into the must. About 24 hours later, sprinkle the yeast on top of the must and stir it in. Add winemaker’s malolactic bacteria—a Leuconostoc species—and stir it in. It’s available from whichever shop sold you your wine yeast. Use the amount proper for the amount of wine you’re making. Your wine shop owner will advise you.
At least twice a day from now until you press the wine off the skins, remove the cloth and board and punch down the cap with your hands. Place your hands on the floating cap of skins and push it down under the liquid. Replace the cloth and board after every operation.
In a day or two, the fermentation will be bubbling. It will grow vigorous and then begin to slow down. By about a week, it will either have stopped completely or be bubbling very slowly. Now it’s time to separate the wine from the skins. Place the funnel in the clean carboy and line it with the mesh bag. Using a quart jar, scoop up wine and skins from the crock and dump them into the mesh bag so the liquid runs out and down the funnel into the carboy. When the bag is half full of skins, wring it out as hard as you can with your hands to expel as much liquid as possible. The bag’s mesh may frequently clog with gunk (spent yeast and grape pulp), so empty it and rinse it clean in the sink when it does. Fill the carboy to within 5 inches of the top, insert the rubber stopper with an airlock inserted into the center hole, and notice whether the wine is still bubbling, sending gas through the airlock. If the wine is still and no gas is escaping, top up the carboy to within 2 inches of the bottom of the stopper. If it’s still bubbling, wait until the bubbling ceases (this can take days), then top it up.
Any leftover wine should be put through the mesh-lined funnel into one or more of the gallon jugs. They should similarly be topped up and stoppered with an airlock. If you have a final jug just partially filled, top it up with a good commercial wine similar to the one you’re making.
Check the airlocks every few days to make sure they are secure and cannot let air into the carboy or jugs. Store the carboy and jugs in a cool, dark place, such as a cellar. After about 3 or 4 weeks, you’ll need to rack the wine off the gunk in the bottom, called the lees. You’ll see it as a light-colored layer in the bottom of the carboy or jugs. Without shaking up the wine, carefully set the carboy or jug on a table and place the clean crock on the floor. Using a piece of the plastic hose, siphon the wine from the carboy or jug into the crock. Note carefully where the end of the hose is located in the carboy and avoid siphoning up any of the gunky lees on the bottom. When the clear wine is siphoned off the lees, cover the crock and wash out the carboy. Then pour the clear wine through the funnel back into the carboy. Top up the carboy with wine from one or more of the jugs you racked clean of lees, now to within an inch of the bottom of the stopper and airlock. Consolidate the cleaned wine from the jugs into one or more jugs, topping up the last jug with a similar commercial wine if necessary. Store them again in a cool, dark place. Check the airlocks from time to time to make sure they are keeping the wine safe from contact with the air.
In 3 more months, repeat the racking procedure. This time there will be far fewer lees at the bottom of the carboy or jugs. After this second racking, store them as before, topping up with a sound and similar wine as needed. Check the airlocks periodically.
In 6 months, it’s time to bottle. Wet your corks by placing them in a clean container of hot water in which you’ve dissolved a few Campden tablets. Siphon the wine from the carboy or jugs into each bottle, leaving about ½ inch of space between the level of the wine and where the bottom of the cork will sit when it’s placed in the bottle’s neck. Place a cork in the hand corker, seat it over the bottle’s opening, squeeze the handles together, and with your other hand, plunge the lever downward, seating the cork. It’ll take a few bottles before you get the hang of it. Have a corkscrew on hand to remove any corks that break or don’t sit right. If there is no airspace between the wine in the neck and the cork, or too much space, withdraw the cork with the corkscrew, adjust the level, and recork with a fresh cork.
Place the freshly corked bottles in their cases, take them to your cool, dark storage area, and store the cases on their sides, so the bottles are horizontal and the wine is in contact with the cork. Wine should always be stored like this. The optimum storage temperature is an even 58ºF, but don’t worry if it’s 70ºF in the back of your clothes closet. A steady, even, and not too warm temperature will do.
At some point during the next year, make labels and put them on the bottles with a glue stick. Wine-and beermaking shops will have labels and foil capsules. You can make the bottles look as fancy as you please. Just don’t put fancy labels on bad wine, or you will look pompous and silly.
Let the wine age for a year after bottling. What will it be like? One never knows, but surprises are usually more pleasant than not.
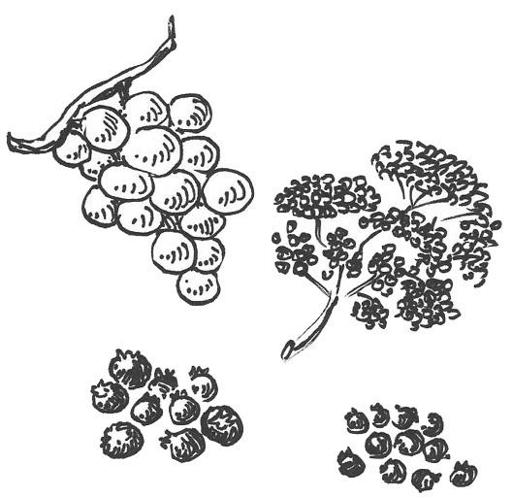
MAKE BREAD STARTER USING ORGANIC FRUIT
Here’s a way to make bread starter using the yeast that occurs on certain kinds of fruits. The best sources for wild yeasts are fruits that have a whitish bloom on their skins—grapes, elderberries, blueberries, and huckleberries in particular. It doesn’t take much fruit to get a culture going, and sugar in the fruit and yeast on the skins mean that nature has everything already set up for you. Use organic fruit; that way you can be guaranteed that the fruit hasn’t been sprayed with toxic fungicides or grown using other agricultural chemicals. If you are harvesting fruit from the wild, choose fruits that grow away from sources of toxins like roadsides, old dump sites, and conventional agricultural fields. Old meadows, woods’ edges, and burnt-over forest sites are ideal.