Authors: Ivy Manning
Crackers & Dips (10 page)
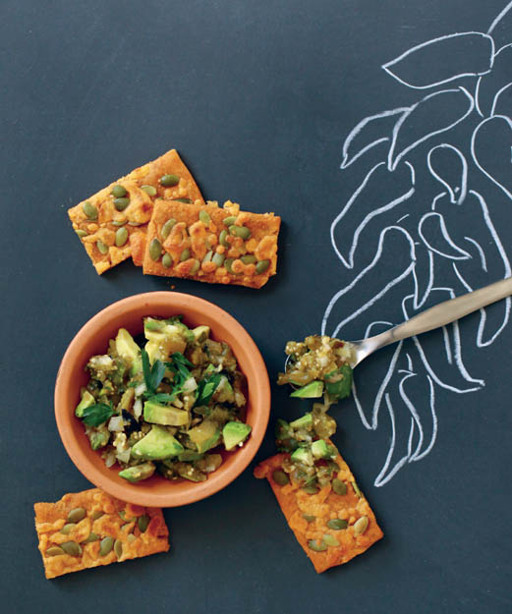
Remove the plastic wrap on top, trim the edges of the dough, and cut the dough into rectangles measuring 2½ by 1½ in/6 by 4 cm. (Save and re-roll the scraps.) Using a bench scraper or spatula, transfer the crackers to the prepared baking sheets, spacing them closely together. Sprinkle the pumpkin seeds and cheese over the crackers, pressing firmly to adhere the seeds and cheese to the dough.
Bake until the crackers are browned at the edges and crisp to the touch (underdone crackers will be quite pliable when you try to bend one), 14 to 15 minutes, rotating the baking sheets once from top to bottom and from front to back while cooking. When the crackers are completely cool, transfer them to an airtight container for up to 5 days.
MACADAMIA NUT AND COCONUT FLOUR CLUB CRACKERS
Coconut flour has become the rock star of the baking world as of late, thanks to its high fiber content (there are 5 g of fiber in just 2 tbsp), relatively high protein content, and mild, slightly sweet flavor. You won’t be able to taste the coconut in this buttery cracker, just a rich, mild flavor reminiscent of Keebler Club crackers. An added bonus: these gluten-free beauties keep well, so they make great gifts for anyone trying to avoid wheat. Try them with the Fresh Artichoke Dip (
page 112
), the Bacon and Caramelized Onion Jam (
page 128
), or slices of artisanal cheese.
MAKES 35 TO 40 CRACKERS
¾ cup/120 g sweet rice flour
½ cup/80 g macadamia nuts
¼ cup/30 g coconut flour
½ tsp baking powder
½ tsp fine sea salt
½ tsp garlic powder
¼ tsp xanthan gum
3 tbsp chilled unsalted butter, cut into ½-in/12-mm pieces
2 eggs
Flaky salt
Preheat the oven to 350°F/180°C/gas 4. In a food processor, combine the rice flour, macadamia nuts, coconut flour, baking powder, fine sea salt, garlic powder, and xanthan gum. Pulse until the nuts are finely ground, about 30 pulses. Add the butter and pulse until the mixture resembles fine granola, 15 pulses. Add the eggs and process until the mixture comes together into a slightly sticky ball.
Form the dough into a rectangle measuring 5 by 6 in/12 by 15 cm that is about 1 in/2.5 cm thick and place it on a piece of parchment paper. Place a piece of plastic wrap on top of the dough
and roll the dough out until it is ⅛ in/4 mm thick, lifting the plastic from time to time to prevent creases from forming in the surface of the dough.
Transfer the dough on the parchment paper to a baking sheet and remove the plastic. Using a pastry wheel or pizza cutter, trim the edges of the dough to fit the baking sheet (scraps can be re-rolled to make another small batch of crackers). Cut the dough lengthwise into 1¼-in-/3.5-cm-wide strips and then crosswise into 3-in-/7.5-cm-long crackers. Sprinkle the crackers with the flaky salt and press lightly with the bottom of a measuring cup to adhere the salt to the crackers.
Bake until the crackers are light golden brown, about 20 minutes, rotating the baking sheet once from front to back while baking. Keep an eye on the crackers; if some are beginning to brown too much before the others are done, transfer them to a cooling rack and return the undone crackers to the oven for a few moments. When the crackers are completely cool, transfer them to an airtight container for up to 10 days.
CRACKER TIP:
Coconut flour is very dense and absorbs a lot of moisture; use too much, and it can make your baked goods too dry. Be sure to spoon coconut flour lightly into the measuring cup when measuring or, better yet, weigh it on a scale for a more precise measure.

4
QUICK AND CRUNCHY: EASY CRACKERS TO MAKE IN MINUTES
CRISPY WONTON TRIANGLES
I used to make these crispy little triangles at an upscale restaurant where they were served as a garnish for a fancy smoked fish salad. By mid-shift, I always had to make more because the kitchen staff nibbled on them incessantly, such was their irresistible crunchiness and nutty flavor. Thankfully, they’re incredibly easy to make: just coat packaged wonton wrappers with egg wash and seeds and deep-fry them.
I think they have a natural affinity for fish, especially in raw applications like the Albacore Tuna Tartare with Hijiki (
page 138
); or try them with Asian-inspired dips like the Wasabi Edamame Schmear (
page 124
). Although you can store them for up to 2 days, they’re at their crispy best within a few hours of cooking.
MAKES 48 CRACKERS
1 tbsp white sesame seeds
1½ tsp black sesame seeds
1 tbsp cornstarch
1 egg
24 wonton wrappers
Fine sea salt
Canola oil for deep-frying
Line two baking sheets with paper towels. In a small bowl, combine the white and black sesame seeds. In another small bowl, whisk together the cornstarch and egg.
Place the wonton wrappers on a cutting board or baking sheet and brush lightly with the egg mixture. Sprinkle with the sesame seeds and salt and tamp the seeds down firmly with the bottom of a measuring cup to adhere the seeds to the wontons. Prick each square several times with the tines of a fork and then use a pastry wheel or pizza cutter to cut each square on the diagonal to make two triangle-shaped crackers from each wrapper.
Pour the canola oil into a small, heavy saucepan to a depth of 2 in/5 cm. Heat the oil over high heat until an instant-read thermometer or deep-fry thermometer reaches 350°F/180°C. (If you don’t have a thermometer,
place one sacrificial wonton in the oil; it should rise to the surface and turn light golden brown in about 10 seconds.)
When the oil has reached the right temperature, add a few triangles to the pan and fry, flipping them once while cooking, until they are the color of new copper, 20 seconds. Transfer the fried crackers to the paper towels. Fry the remaining wonton triangles in small batches of 2 or 3 crackers per batch, adjusting the heat as necessary to keep the oil at about 350°F/180°C. The crackers are best served the day that they are fried.

FRICO WITH BASIL
There are just two ingredients to these little Italian-style cheese crisps, but every time you serve them, you’ll be pronounced a genius. Traditionally, frico are made with aged Asiago cheese in their home region of Friuli, Italy, but I’ve found that just about any hard, aged, dry cheese will make wonderful frico; you might try the recipe with aged Parmigiano-Reggiano, grana Padano, Gruyère, Manchego, or Gouda cheese. Keep in mind that the moister the cheese, the chewier the frico, and the drier the cheese, the more crisp your crackers will be.
I add a fresh basil leaf to the center of each cracker before I bake them, but you can also garnish these little cocktail nibbles with a pine nut or walnut, as your fancy or pantry demands. Serve these rich cheese rounds with glasses of Prosecco (Italian sparkling wine) or on top of salads that need a little salty crunch.
MAKES 14 WAFERS
1 cup/60 g finely grated hard cheese (see headnote)
14 small fresh basil leaves
Preheat the oven to 400°F/200°C/gas 6. Line two rimmed baking sheets with silicone baking mats or parchment paper, cutting the paper so that it fits perfectly into the pans. Measure level table- spoonfuls of the cheese and space them 2 in/5 cm apart in little mounds on the prepared sheets. Gently press a basil leaf into the center of each mound of cheese.
Bake until the cheese has spread out and become lacy looking and the edges have begun to turn golden brown, 5 to 8 minutes, rotating the pans once from top to bottom and from back to front during baking. Watch carefully; if some crackers are beginning to brown too much before the others are done, transfer them to paper towels and return the undone crackers to the oven for a few moments.
Allow the frico to cool for 3 minutes on the baking sheets and then transfer them to paper towels to absorb any excess fat. Allow the frico to cool completely before transferring them to an airtight container. Frico can be kept at room temperature for up to 3 days.
CRACKER TIP:
If you are a stickler for perfectly shaped crackers, use a round cookie cutter to coax the ragged edges of the cheese into a perfect circle while the baked crackers are still warm.

ZA’ATAR-DUSTED PITA CHIPS
I have to laugh when I see bags of pita chips for sale at the grocery store. All you have to do is cut pita bread into wedges, toss them with oil, and bake them! If only people knew how easy it is to make homemade pita chips, and how much better they taste than the greasy, salty bagged chips.
In this recipe, I sprinkle my homemade pita chips with
za’atar
, a Middle Eastern herb blend (in this case homemade) that is often mixed with olive oil and used as a bread dip. The dried savory, thyme, and tart sumac in za’atar give these chips an exotic flavor that is especially tasty when served with dips of a similar eastern Mediterranean ilk such as Tzatziki (
page 123
) or Spicy Red Lentil Dip (
page 109
). Although these chips keep for up to 3 days, it’s best to reheat them briefly so they can regain some of their original savor.
MAKES 64 CHIPS
2 tsp dried savory
1 tsp dried thyme
2 tsp sesame seeds
½ tsp sumac
½ tsp kosher or flaky salt
4 pita bread rounds