Food in Jars (25 page)
Authors: Marisa McClellan
I
LOVE A GOOD STADIUM HOT DOG. TO ME, THE PERFECT
dog is served in a squishy bun and dressed with mustard, relish, and chopped onions (dispensed in bulk from a stainless steel container with a rotary handle that controls the output). This relish tastes just like my memory of that stadium stuff, only I know everything that went into it. Plus, it uses up piles of produce, which is a huge plus in July or August.
6 cups/890 g chopped green bell pepper (about 8 whole peppers)
6 cups grated zucchini (about 3 pounds zucchini)
2½ cups grated onion (about 2 large onions)
4 cups/960 ml apple cider vinegar, divided
2 cups/400 g granulated sugar
2 tablespoons sea salt
2 tablespoons mustard seed
1 teaspoon celery seed
½ teaspoon red pepper flakes
Prepare a boiling water bath and 5 regular-mouth 1-pint/500 ml jars according to the process on page 10. Place the lids in a small saucepan, cover them with water, and simmer over very low heat.
Combine the chopped bell pepper, zucchini, and onion in a large, nonreactive pot. Stir in 2 cups/480 ml of the apple cider vinegar and bring to a simmer over medium heat. Cook until the vegetables have cooked down, about 30 minutes.
Drain the vegetables and return to the pot. Add the remaining apple cider vinegar, sugar, salt, mustard seed, celery seed, and red pepper flakes. Bring to a simmer and cook for 5 minutes.
Ladle the relish into the prepared jars, leaving ½ inch/12 mm of headspace. Gently tap the jars on a towel-lined countertop to help loosen any bubbles before using a wooden chopstick to dislodge any remaining bubbles. Wipe the rims, apply the lids and rings, and process in a boiling water bath for 10 minutes (see
page 11
).
When the processing time is up, remove the canning pot from the heat and remove the lid. Let the jars sit in the pot for an additional 5 minutes. This helps to prevent the relish from reacting to the rapid temperature change and bubbling out of the jars.

I
F YOU LIKE CARAMELIZED ONIONS, YOU MUST TRY
this relish. It is sweet (but not saccharine), substantive, and smooth. I like to eat it with a creamy goat cheese or freshly made ricotta. It's also, great on pizza in place of the tomato sauce. Once you have this one on your pantry shelf, you'll soon find that you'll be putting it on everything. And I don't think there's anything wrong with that.
1 tablespoon unsalted butter
4 to 5 large red onions, sliced into thin half-moons (about 10 cups/1.2 kg)
1 cup/200 g (packed) brown sugar
1 cup/240 ml apple cider vinegar
½ cup/120 ml malt vinegar
2 teaspoons sea salt
1 teaspoon garlic powder
½ teaspoon freshly ground black pepper
¼ teaspoon cayenne pepper
Prepare a boiling water bath and 3 regular-mouth 1-pint/500 ml jars according to the process on page 10. Place the lids in a small saucepan, cover them with water, and simmer over very low heat.
Melt the butter over medium-low heat in a large, nonreactive and add the onions. Cook until the onions are golden and fragrant, about 20 to 25 minutes.
Add the remaining ingredients. Increase the heat and bring to a boil, then reduce the heat and simmer for 10 minutes, until the liquid has reduced.
Ladle the relish into the prepared jars. Gently tap the jars on a towel-lined counter-top to help loosen any bubbles before using a wooden chopstick to dislodge any remaining bubbles. Wipe the rims, apply the lids and rings, and process in a boiling water bath for 15 minutes (see
page 11
).
When the processing time is up, remove the canning pot from the heat and remove the lid. Let the jars sit in the pot for an additional 5 minutes. This helps to prevent the relish from reacting to the rapid temperature change and bubbling out of the jars.


F
OR MY FIRST FIFTEEN YEARS OF LIFE, ANY CONTACT
with raw tomatoes made me break out in an itchy, red rash. This was a hard thing in a household of tomato fans, particularly during the months of July, August, and September, when our backyard plants were growing prodigiously and all my mom wanted to make for dinner were salads of cucumber and sliced ripe tomato. I was also wary of cooked tomatoes and would only eat pasta sauces that were puréed smooth. It was a pain for everyone involved.
Thankfully, around the time I turned sixteen, the allergy disappeared and I discovered just why people raved about homegrown tomatoes. They are amazing. Since then, I've spent my summers making up for those lost years. I eat them with every meal where they make sense and I typically can up to a hundred pounds of locally grown paste or Roma tomatoes every September (always praising my body for having the smarts to outgrow that allergy). My goal is to put up enough local tomatoes to ensure that I won't run out until May or June.
Most years, the bulk of my tomato preservation is done in quarts of whole, peeled tomatoes. I find them to be the most versatile when it comes to cooking (and, when you're trying to move a hundred pounds of tomatoes through your kitchen in a three-day weekend, a single, streamlined process is your friend). If I'm not in too much of a rush, I also make a basic tomato sauce (truly, no more than a smooth, basil-spiked version of the whole peeled tomatoes), a marinara/pizza sauce (for those nights when you need something that's a little closer to being ready to eat than a jar of whole tomatoes), and a couple variations on chopped tomatoes.
Anytime you talk about canning tomatoes, the issue of acid content must be considered. We all think of tomatoes as being incredibly high in acid, right? But when it comes to having enough acid for boiling water bath canning, tomatoes
are actually in the grey zone. Plums and apples have more acid than a basic tomato does. This means that tomato products have to have acid added to them to be safe for canning. You may be thinking, “But my grandma never added acid to her tomatoes and we were always fine.” There's a good reason for that. Modern tomatoes have been bred to be sweeter and lower in acid. Nice for today's palate, but not so good for canning safety. It's easy enough to remedy the acid situation when it comes to canning by adding lemon juice to your products before canning. Make sure you don't skip or reduce the amount of acid in the following recipes, as it a key player in ensuring the safety of your finished products.

T
HESE TOMATOES ARE ONE OF MY PANTRY STAPLES
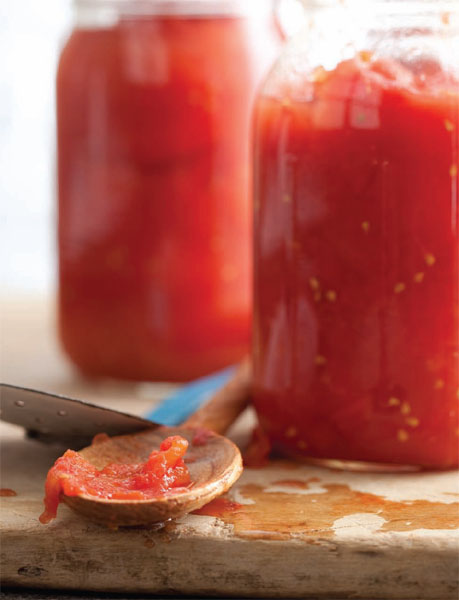
and after several years of canning them at home, I find it hard to remember how I lived without them. Once you find your rhythm, the process of removing the cores, scoring the end to make peeling easy, and blanching the tomatoes briefly in a pot of boiling water they go fairly fast. Try them in soups, stews, or crushed over a pizza crust (a particularly good technique when I've used up all the marinara sauce). I like to can these in quart jars and so those are the instructions given below. If you feel that pints would be more appropriate for you, feel free to use pint (500 ml) jars and reduce the processing time to 40 minutes.
10 pounds/4.5 kg Roma or paste tomatoes
½ cup/120 ml bottled lemon juice, divided
Prepare a boiling water bath and 4 regular-mouth 1-quart/1 liter jars according to the process on page 10. Place the lids in a small saucepan, cover them with water, and simmer over very low heat.
Bring a large pot of water to a boil. While it heats, core the tomatoes and, using a small, sharp knife, score the bottom of each tomato with a shallow X. Fill a large bowl two-thirds full with ice-cold water. (The cold water stops the cooking and cools the tomatoes down enough for you to peel them after blanching.)
Working in batches, add the tomatoes to the boiling water and cook for 1 to 2 minutes. Immediately transfer the tomatoes to the bowl of ice-cold water to cool. Once they tomatoes are cool, remove them from the cold water bath. Repeat with the remaining tomatoes, making sure to give the water a chance to come back up to boiling between batches. If the water isn't hot enough, you will have a hard time removing the skins during peeling.
When the blanched tomatoes are cool enough to handle, grab one and peel the skin off with your fingers. The blanching should have loosened it to the point where it curls off the tomato and is easy to pull free.
Bring a full kettle of drinkable water to a boil. This will be the liquid you add to your tomatoes.
