Foundation Game Design with ActionScript 3.0, Second Edition (21 page)
Read Foundation Game Design with ActionScript 3.0, Second Edition Online
Authors: Rex van der Spuy
Figure 2-58.
Select the Paint Bucket Tool and click inside the new hill to change its color.
Select the Move Tool and move the hill to the bottom left corner of the canvas, as shown in
Figure 2-59
.
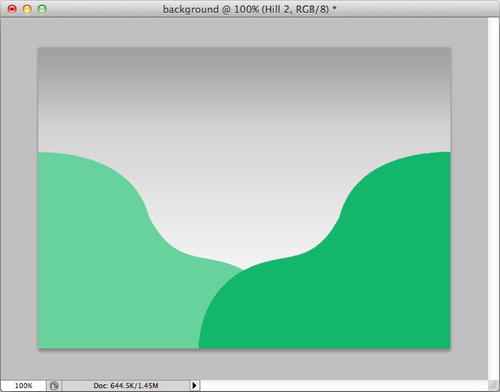
Figure 2-59.
Move the new hill into its position.
The new, darker hill that you've created should be behind the first so that it looks like it's a bit further away in the distance. Let's move its layer so that it's below the first hill's layer.
In the Layers palette, drag the Hill 2 layer so that it's below the Hill 1 layer. Release the mouse and you should now see the darker green hill behind the light green hill, as shown in
Figure 2-60
.
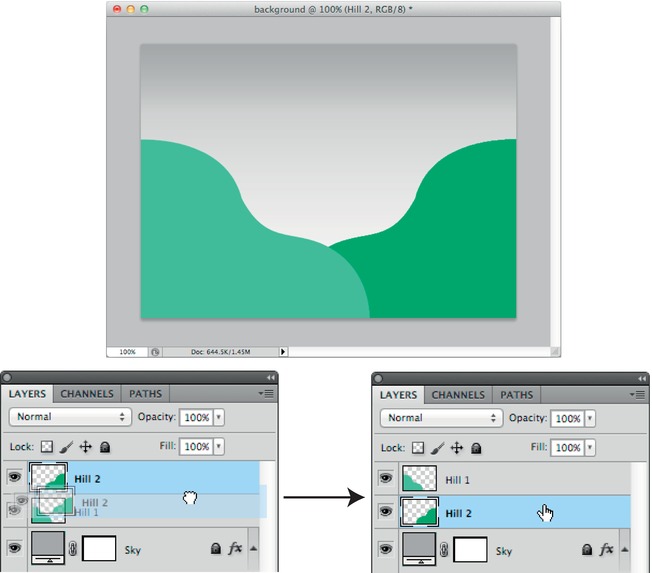
Figure 2-60.
Drag Hill 2 below Hill 1 to rearrange the layering of the hills on the canvas.
Being able to rearrange layers like this is one of the most basic, but most powerful, Photoshop techniques.
Your hills are looking better, but let's go one step further and give them a slight 3D effect with a technique called
beveling
.
The complementary effects of bevel and emboss allow you to give objects an appearance of shallow depth. Embossing makes an object appear imprinted into a surface. Beveling makes it look slightly raised from the surface.
Figure 2-61
illustrates bevel and emboss effects.
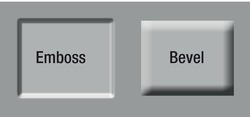
Figure 2-61.
Bevel and emboss effects
An important concept to keep in mind when you apply effects like this in Photoshop is that you don't apply effects to the actual image you've drawn; you apply them to the layer that contains the object. That's why they're called layer effects. Any graphics on that layer will be affected by whatever effects you've applied to that layer. This is different from many other graphics and drawing applications where you apply effects directly to graphic objects.
So, apply a bevel effect to your hills. Select the Hill 1 layer and choose Bevel and Emboss from the FX menu, as shown in
Figure 2-62
.
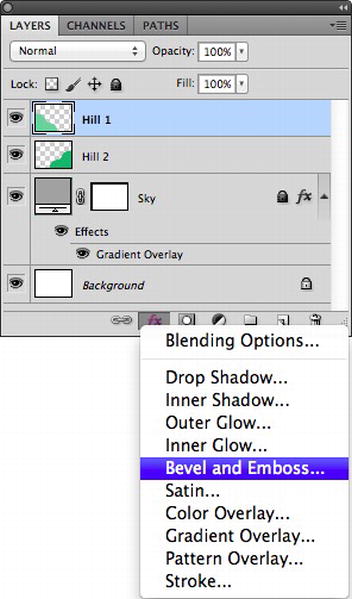
Figure 2-62.
Select the Bevel and Emboss from the FX menu.
The Layer Style window opens. You saw this window before when you were working with gradients. But now the Bevel and Emboss option has been selected, which allows you to apply either of those effects
Select Inner Bevel from the Style menu. Make sure that the Preview option is checked so that you can see how your changes affect the graphics on the canvas. Play around with the settings until you achieve an effect you like. You'll have a more dramatic effect if you uncheck the “Use global light” option.
Figure 2-63
shows what my Layer Styles window looks like, and
Figure 2-64
shows the result of the bevel effect on the hill. But whatever you do, don't click the OK button just yet!
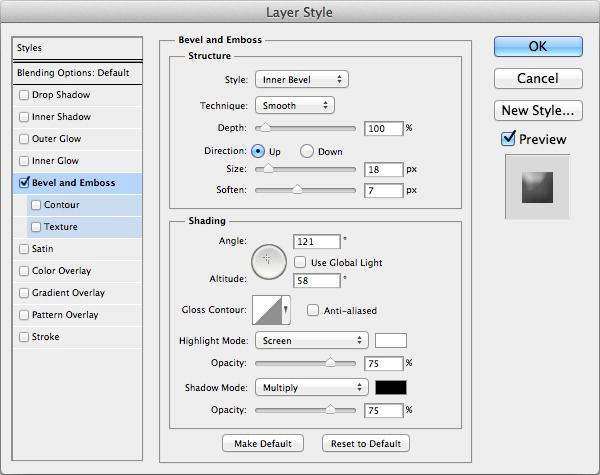
Figure 2-63.
The Layer Style window lets you set up and apply Bevel and Emboss effects to selected layers.
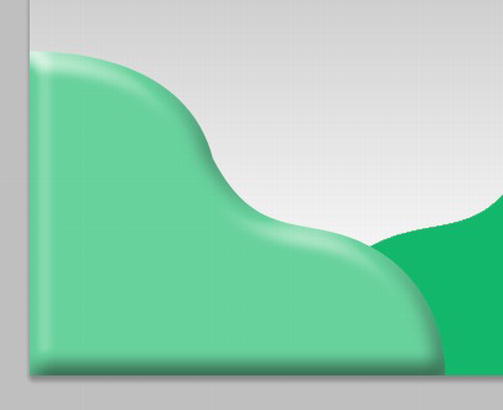
Figure 2-64.
The finished bevel effect
Creating bevel and emboss effects is very much a question of just playing around with the settings until you find something you like.
Save this layer style so that you can apply the same effect on the second hill. Click the New Style button in the Layer Effects window. A New Style window will open. Enter the name Hill and click the OK button (
Figure 2-65
).

Figure 2-65.
Save this style so you can use it later.
Click OK in the Layer Style window to apply the bevel effect to the hill.
You're now going to apply the same effect to the second hill.
Select the Hill 2 layer.
Open the Styles panel, which you'll find in the same window group as the Colors panel. The Styles panel shows you a thumbnail list of some preset styles that can be applied to layers. The very last one will be the Hill style that you created and saved in the previous section. Click on it, and you'll see the style immediately applied to the second hill.
Figure 2-66
shows what you'll see.
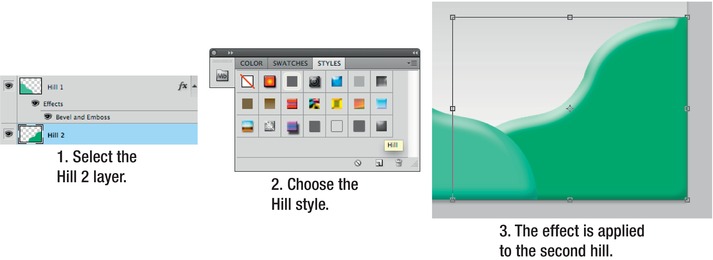
Figure 2-66.
Click the Hill style in the Styles panel to apply the saved style to the second hill.
You've finished working on the hills, so lock both the Hill 1 and Hill 2 layers to prevent accidentally editing them in the next steps. Select the layer you want to lock, and click the padlock buttons. Padlock icons will appear on the layer (
Figure 2-67
).
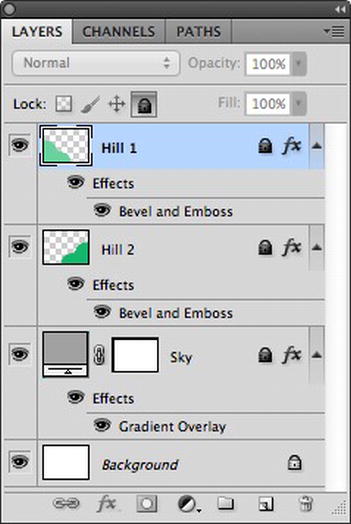
Figure 2-67.
Lock the layers to prevent further editing.
You now have a nice background scene with a sky and some hills. In the next section, you're going to add some boxes to the foreground and learn how to make shapes using selection areas.
So far I've shown you two ways to make shapes with Photoshop. The first was how to use the Rectangle shape tool to make the sky. The second was how to create a path with the Pen Tool and fill the path with color. In this section, you'll look at a third way: how to create a selection area and fill it with color.
You'll find Photoshop's Selection tools at the top of the Tools panel. They're usually used to select areas of a photograph for editing, such as to copy, paste, or delete sections, but they're also a quick and easy way to make shapes. You're going to use the Rectangular selection tool to make some boxes for the foreground of your game world scene.