Foundation Game Design with ActionScript 3.0, Second Edition (95 page)
Read Foundation Game Design with ActionScript 3.0, Second Edition Online
Authors: Rex van der Spuy
The only bit of new code is the for loop in theenterFrameHandler.
for(var i:int = 0; i < _boxes.length; i++)
{
  Collision.block(_character, _boxes[i]);
  if(Collision.collisionSide == "Bottom")
  {

//Tell the character that it's on the

//ground if it's standing on top of

//a platform
    _character.isOnGround = true;

//Neutralize gravity by applying its

//exact opposite force to the character's vy
    _character.vy = -_character.gravity;
  }
  else if(Collision.collisionSide == "Top")
  {
    _character.vy = 0;
  }
  else if(Collision.collisionSide == "Right"
    || Collision.collisionSide == "Left")
  {
    _character.vx = 0;
  }
}
It loops through all of the boxes in the_boxesarray and checks them for a collision against the character.
for(var i:int = 0; i < _boxes.length; i++)
{
  Collision.block(_character, _boxes[i]);
The collision class contains a static String property called collisionSide that tells you on which side of the character the collision is occurring. You can access the collisionSide property like this:
Collision.collisionSide
If there's no collision, collisionSide will be “No collision”. But if there is a collision, it will have the value of either “Top”, “Bottom”, “Left”, or “Right”. You can use collisionSide in an if statement to make specific changes to the collision based on the side of the character that the collision is occurring on.
Figure 9-18
illustrates this.
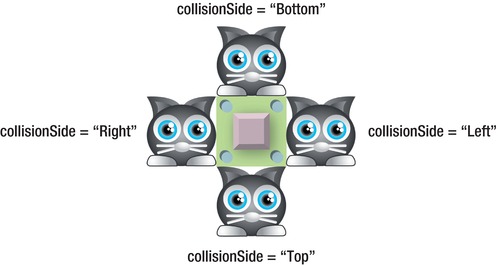
Figure 9-18.
Use the Collision class's collisionSide property to find out which side of the character is hitting the box.
The reason you need to know this is so that you can set the character's velocity to zero when it hits the one of these sides. This creates the effect of the box absorbing the character's force, which results in a very natural looking effect. If the character collides on its top, left, or right side, this is just a simple matter of setting the vy or vx to zero, like this:
else if(Collision.collisionSide == "Top")
{

_character.vy = 0;
}
else if(Collision.collisionSide == "Right"
  || Collision.collisionSide == "Left")
{

_character.vx = 0;
}
But if the character hits the box on its bottom side, there's a little technical detail you must resolve. Gravity is constantly pulling the character down the stage, so you can't simply stop the character by giving it a zero vy value. You must actively counteract the force of gravity by assigning the character's vy a negative gravity value, like this:
if(Collision.collisionSide == "Bottom")
{
        _character.isOnGround = true;

_character.vy = -_character.gravity;
}
If you don't do this, gravity will keep trying to pull the character down into the box, and this can sometimes result in it getting stuck in corners where two boxes meet. Neutralizing the force of gravity completely prevents this.
Here's a fun little modification. You can make the boxes bouncy by replacing the previous bit of code with this one:
_character.vy = -_character.vy / 2;
With this line of code, the character will bounce bit before settling on the top of the platform. If you want to make very springy kind of platform, like a trampoline, you could instead reverse the character's velocity like this:
_character.vy = -_character.vy;
Or, for a super-bounce, multiply it, like this:
_character.vy = -_character.vy * 1.5;
The other thing that happens when the bottom of the character hits the top of a platform is that its isOnGround property is set to true.
_character.isOnGround = true;
This is exactly what happens when the character hits the bottom of the stage and re-enables its jump ability.
And this is the only new code you need to know! You now have a fun little toy to play with. How will you use it to make a game? Think about the skills you learned in
Chapters 6
,
7
, and
8
, and you'll realize that you already know how.
You now have some great new game design techniques you can use to make many different types of games. But how do you actually use them in the context of real games? In the book's download package you'll find a bonus chapter called
Case Studies: Maze and Platform Games
. It contains a detailed look at two games.
- A-MAZE-ing Monster Mayhem: A maze game featuring monsters that can move through a complex maze environment.
- Bug Catcher: A platform game featuring new enemy, AI techniques, a game state manager, detailed information about how to rotate objects toward other objects, and an explanation of how to change the stacking order of objects on the stage.
Figure 9-19
shows what these two games look like.
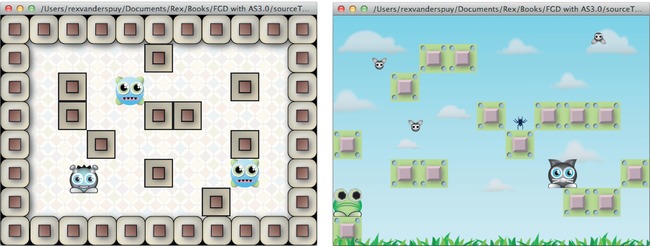
Figure 9-19.
A-MAZE-ing Monster Mayhem and Bug Catcher case studies in the book's download package
I covered a number of new techniques in this chapter, all of which you'll find a use for in your own game projects. The specific game logic that you use to solve the conditions for winning and losing, as well as artificial intelligence for your game characters, will be different with every project. But hopefully this chapter has shown you some approaches to tackling these issues and some of the things that you'll need to think about in order to solve these problems in your own games.
This has been a basic introduction to platform games, physics, and managing lots of game objects, but you'll find all the building blocks here to start you off building a game that could become quite complex with a bit of planning and imagination. Add a bit of the puzzle solving and task completion, and maybe a few animated enemies, and you'll be well on your way to building a really fun game. You could also add a weapon and even some scrolling so that the player could explore a large area. What about items that give the player some special abilities, or maybe some vehicles to drive?
One bonus of the collision code that you're using is that it tells you which side of the platform the player is hitting. You can adapt it for enemy collisions to find out whether the player is jumping on an enemy's head, which is the classic way of vanquishing enemies in platform games. You can also adapt the physics code to create a flight-based action game, such as Joust, or a flight rescue or exploration game, such as Lunar Lander, Choplifter, or Defender. Actually, just about any 2D platform game is within your reach. And what about moving platforms? It could be interesting!
In the next chapter, you'll take a closer look at enemy artificial intelligence and scripted motion. I'll show you player control schemes that use the mouse. I'll also show you how to move objects and fire bullets in 360 degrees.
Advanced Object And Character Control
You now have all the skills you need to build a wide variety of games, but there's still much more you'll want to learn. In this chapter, we'll take a look at the following useful techniques you'll need to know to get started on your own professional-level game design projects:
- Using easing for smooth motion
- Controlling game characters with the mouse
- Moving objects in the direction of their rotation
- Firing bullets in all directions
- Learning basic enemy artificial intelligence (AI): following, running away, and firing bullets in the direction of the player
- Complex player-controlled objects: a spaceship, a mouse-controlled platform character, a car, and a tank
This is quite a big and dense chapter, so don't feel you need to absorb all these techniques at one sitting. I've designed this chapter as a toolbox for you to delve into when you're trying to solve a particular problem in your own game design projects. Take it one small bite at a time and try to apply the techniques to your projects as much as possible.
So, without further ado, on with the game!
If you start designing games professionally, your clients will probably expect that the game controls rely on the mouse instead of the keyboard. And if you can design game controls using the mouse exclusively, you're only a small step away from designing games for touch screen interface devices, such as the iPhone, iPad, or Android phones and tablets.
So, let's take a step-by-step look at how to control objects with the mouse.
Let's first start by fixing an object to the mouse's x and y positions using theMouseclass. In the chapter's source files, you'll find a project folder called MousePointer. Run the SWF and you'll find that you can control the up-and-coming star of this chapter, Button Fairy, just by moving the mouse around the stage.
Figure 10-1
illustrates what you will see.
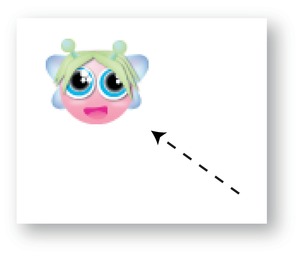
Figure 10-1.
Move the mouse to make Button Fairy fly around the stage.
When you move the mouse, the mouse pointer disappears, but the object remains fixed to the exact position where it would be. This is a technique that you can use to create a custom mouse pointer for any of your games.
All the code is in theMousePointerapplication class, as follows:
package
{
  import flash.display.Sprite;
  import flash.events.Event;
  import flash.ui.Mouse;
  import flash.events.MouseEvent;
  [SWF(width="550", height="400",
  backgroundColor="#FFFFFF", frameRate="60")]
  public class MousePointer extends Sprite
  {
    private var _fairy:Fairy = new Fairy();
    public function MousePointer()
    {
      stage.addChild(_fairy);
       //Hide the mouse
      Mouse.hide();
      stage.addEventListener(Event.ENTER_FRAME, enterFrameHandler);
    }
    private function enterFrameHandler(event:Event):void
    {

//Center the fairy over the mouse
      _fairy.x = mouseX - (_fairy.width / 2);
      _fairy.y = mouseY - (_fairy.height / 2);
    }
  }
}
This code relies on the use of theMouseclass, so the first thing you need to do is import it.
import flash.ui.Mouse;
The constructor method hides the mouse using theMouseclass'shidemethod.
Mouse.hide();
Finally, it fixes and centers the fairy's position to the now invisible mouse by using the stage'smouseXandmouseYproperties.
_fairy.x = stage.mouseX - (_fairy.width / 2);
_fairy.y = stage.mouseY - (_fairy.height / 2);
And there you have a custom mouse pointer!
It's likely that in a game scenario you will want your character to move with a little more grace than simply staying fixed to the mouse position exactly. You can use a simple technique called
easing
that gradually slows an object to a stop, and you can use it to create some very elegant systems to move objects.
In this chapter's source files, you'll find a folder called EasingWithMouse. Run the SWF to see the effect. Move the mouse, and Button Fairy will chase it around the stage and gracefully ease into position under it. You can see this illustrated in
Figure 10-2
.
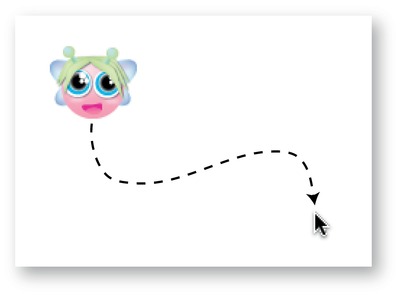
Figure 10-2.
Button Fairy follows the mouse with a bit of delay.
Here's the application class that achieves this effect. There's one new feature you haven't seen before: the valueEASING, which is a special kind of value called a
constant
. I'll explain how constants work in a moment.
package
{
  import flash.display.Sprite;
  import flash.events.Event;
  import flash.events.MouseEvent;
  import flash.ui.Mouse;
  [SWF(width="550", height="400",
  backgroundColor="#FFFFFF", frameRate="60")]
  public class EasingWithMouse extends Sprite
  {
    private var _fairy:Fairy = new Fairy();
    private const EASING:Number = 0.1
    public function EasingWithMouse()
    {
      stage.addChild(_fairy);
      stage.addEventListener(Event.ENTER_FRAME, enterFrameHandler);
    }
    private function enterFrameHandler(event:Event):void
    {
      //Figure out the distance between the
      //mouse and the center of the fairy
      var vx:Number
        = stage.mouseX - (_fairy.x + _fairy.width / 2);
      var vy:Number
        = stage.mouseY - (_fairy.y + _fairy.height / 2);
      var distance:Number = Math.sqrt(vx * vx + vy * vy);
      //Move the fairy if it's more than 1 pixel away from the mouse
      if (distance>= 1)
      {
        _fairy.x += vx * EASING;
        _fairy.y += vy * EASING;
      }
    }
  }
}
The code needs to know how far away the fairy is from the mouse. It first calculates a distance vector, using some familiar code.
var vx:Number
  = stage.mouseX - (_fairy.x + _fairy.width / 2);
var vy:Number
  = stage.mouseY - (_fairy.y + _fairy.height / 2);
It then applies a simple formula, the Pythagorean Theorem, and copies the result into a variable calleddistance.
var distance:Number = Math.sqrt(vx * vx + vy * vy);
The Pythagorean Theorem states that “the square of the hypotenuse of a right triangle is equal to the sum of the squares on the other two sides.” Translated into practical AS3.0 code, this means you need to use the built-inMath.sqrtfunction to find the square root of the sum of the vx and vy values, which are then multiplied by each other. Luckily for you, Pythagoras was right! Whenever you need to find the distance between two points, use his formula. It will become a regular in your arsenal of game design tricks, and you'll be using it quite frequently in this chapter.
One pitfall of using Math.sqrt is that it's one of the most CPU-intensive math functions you can call. If you can avoid using it, you'll save a great deal of processing power.
How can you avoid it? Try exchanging CPU power for brain power: use a handheld calculator and precalculate the value yourself!
As an example, let's say you want to run some code if an object comes within 75 pixels of another object. First, calculate the distance squared, like this:
var distanceSquared:Number = (vx * vx + vy * vy);
Then run some code if that distance is less than 75 pixels, like so:
if (distanceSquared < 5625)
{

//Directives to run if object is within range…
}
Where does 5625 come from? It's 75 × 75 (or 75
2
). By calculating the value yourself, you can drop Math.sqrt, and the effect will be exactly the same, except that you'll probably notice that your object moves a little more smoothly across the stage.
Of course, 5625 is not really a very understandable number to work with, especially while you're designing and testing a game. However, you should always consider optimizing any code that uses Math.sqrt like this in the final stages of polishing up.
Now that the program knows what the distance is between the two points, the code uses anifstatement to move the object if the distance between the mouse and the fairy is greater than 1 pixel.
if (Math.abs(distance) >= 1)
{
  _fairy.x += vx * EASING;
  _fairy.y += vy * EASING;
}
Easing is the effect that you can see as Button Fairy gently “eases” into place over the mouse. Here are the two lines of code that achieve this effect:
_fairy.x += vx * EASING;
_fairy.y += vy * EASING;
Easing is very easy to implement using a simple formula inside anENTER_FRAMEevent, like so:
(origin - destination) * easingValue;
You can make the animation happen faster or slower by changing the easing value. In the following example, this value is stored in a constant calledEASINGand has a value of0.3.
private const EASING:Number = 0.3;
Changing it to a higher number, such as 0.5, makes the easing effect happen much more quickly. Changing it to a lower number, such as 0.1, creates a much slower effect.
This is the first time we've used a constant in an example. Constants are just like variables, except their values never change. They're “constant.” You declare a constant with the keywordconst. By convention, constants are always written in uppercase letters. Programmers use constants to ensure that they don't accidentally over-write a value that should never change in a program. AS3.0 won't let you change the value of a constant after you've assigned one to it. If you know you're going to be using values that won't or shouldn't change, try and get into the habit of using a constant rather than a variable.
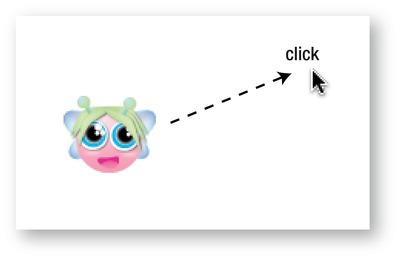
With a small modification, you can make Button Fairy fly to any point on the stage where you click. Open the ClickToMove project folder and run the SWF file. Click anywhere on the stage and Button Fairy serenely flutters to that spot. You can see this illustrated in
Figure 10-3
.
