I'm Just Here for the Food (22 page)
Read I'm Just Here for the Food Online
Authors: Alton Brown
Tags: #General, #Courses & Dishes, #Cooking, #Cookery
Hardware:
Large zip-top freezer bag
Rack set over baking sheet
3 pie pans or round cake pans
10- to 12-inch cast-iron skillet or
electric skillet
Meat thermometer
This is trash cuisine at its best.
Calamari Crunch
Fried calamari may be the most popular restaurant appetizer in all of Christendom. I’m amazed that McSquid hasn’t started popping out of drive-thrus worldwide. And yet we never make it at home. I asked a calamari-crazed friend of mine recently why this was. He simply replied, “Man, that’s strictly restaurant food.”
That’s silly. Calamari is a great home dish for snacking or entertaining. What’s more, it plays well with others. Top a simple plate of spaghetti and tomato sauce with a handful of these golden rings and you’ve got…restaurant food. (By the way, feel free to replace the secret ingredient, Rice Krispies, with any brand of puffed rice cereal.)
Application: Immersion-Frying
Clean the calamari, removing the head and ink sac if necessary, and then the cartilage; rinse thoroughly. Cut the tubes of calamari into rings and make sure the beak has been removed from the tentacles. In a mixing bowl, combine the buttermilk and water, then place the small hand strainer inside the bowl. Add the calamari and toss to coat with the liquid.
Add only enough oil to fill the fryer half-full, then heat the oil to 350° F.
Meanwhile, in the plastic container combine the cornstarch, flour, cereal, salt, and pepper. Close the container and shake to combine.
When the oil is hot, use the strainer to lift the calamari from the liquid, let it drain, and then transfer to the dredge mixture, scattering the pieces so they do not clump. Reseal the container and shake until the calamari is evenly coated.
Using the spider and working over a plastic placemat, lift the calamari from the dredge, gently shake off any excess flour, and drop into the oil. Once the first burst of steam settles down, gently push down on the calamari with the spider to make sure that the rings don’t fuse together.
Work in batches to avoid overcrowding the oil. Folding the placemat like a funnel, return any excess flour mixture to the container and add more as needed.
Allow the calamari to cook until it is just golden in color and floats to the surface of the oil, about 30 to 45 seconds. Remove one ring, cool it briefly, and give it a taste. If the crust has crunch and the calamari feels soft, you can remove the entire batch to the draining rig with a sweep of the spider. If you want a little more color, let it cook a little longer, but remember that calamari gets tough when overcooked. Repeat with the remaining calamari.
Yield: 2 servings
Note:
If you’re serving a crowd, fight the temptation to cook too large a batch. Move your draining rig to a warm oven and stockpile the calamari as it’s cooked—it will keep for up to 30 minutes without becoming rubbery.
Software:
½ pound calamari
1 cup buttermilk
¼ cup water
1 cup cornstarch
1 cup all-purpose flour
1 cup Rice Krispies, ground fine in
a food processor
2 teaspoons table salt (kosher salt
will sink to the bottom of the
dredge)
1 tablespoon freshly ground white
pepper
2 quarts safflower or peanut oil
Small hand strainer
Mixing bowl just large enough to
hold the strainer
Sealable plastic container
Large, long-handled, wide-mesh
hand strainer (referred to in the
trade as a “spider”)
Clean plastic placemat
Electric fryer or heavy Dutch
oven fitted with a fat/candy
thermometer
Draining rig
Paper towels soak up oil but then the food has to sit in it. Newspaper also wicks oil well, but the food still sits in the grease. And, many inks are fat soluble, so you get a nice reversal of newsprint on the food. Yum.
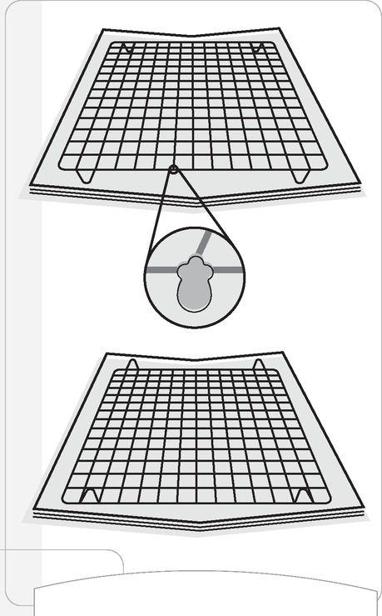
Racks are great except that fat (especially used fat) hangs in droplets under suspended bars and slowly soaks into food. What then must we do? The drainage answer: Turn the cooling rack over so that it’s in direct contact with newspaper. That way oil runs off food over bars and onto paper. The food stays above the fray and no droplets accumulate on the rack.
Quick-Dip Potato Strips
Once you taste your own you may never go back to store-bought chips again. I don’t peel my potatoes here, but it won’t matter if you do.
Application: Immersion-Frying
Place the drain basket of a salad spinner in its base (the bowl) and fill halfway with cold water.
Heat the oil. When it reaches 350° F, use a vegetable peeler to carefully carve long strips off the potato, moving straight from end to end. As the flat side becomes wider, rotate the potato a bit so that you don’t end up with a surface wider than the cutting plane of the peeler. Repeat this so that you end up with three flat spots on the potato to peel from. This way most of your strips will be of uniform width—that is, as wide as the cutting area of the peeler, and about 4 inches long. Allow these strips to fall directly into the water in the salad spinner.
When you’ve cut about 15 strips, remove the basket from the bowl, drain the water, and spin the strips in the salad spinner to dry them; do not skip this step under pain of death.
Hold the strips in one hand just over the hot oil (its temperature should be between 360° and 380° F). Move your fingers back and forth so that the strips fall separately into the oil. Be ready with a splatter guard because the oil will bubble furiously for a few seconds. When the bubbles subside, use a slotted spoon to gently push down on the strips to keep them fully submerged and separate. Do not stir. As the strips dry and stiffen you’ll be able to flip them over, which will help to ensure even doneness.
When the strips are pleasantly golden brown and the bubbles start to slow noticeably, spread the strips on a draining rack and immediately season with salt and pepper.
(If you use brand-new oil, the first batch of potato strips may be on the pale side. If this is going to bother you, make the first batch small and cook it a little past what you would consider done.)
Start peeling the next batch into the water, and repeat. The oil will be back up to temperature and ready to go by the time you are. While the new strips are in the oil, stack the finished strips in a serving dish.
You’ll be shocked how many of these potato strips you can get out of one spud. You’ll also be surprised by how great they look. Above all, you’ll be surprised by the flavor.
Yield: A stack o’ chips (which no matter how many you make, should be considered a single serving; if there’s more than one person, there’s going to be a fight).
Note:
If your strips go a little stale on you after a day or two, lay them on paper towels and microwave on high for a minute or two to drive out the moisture.
Software:
2 quarts canola oil for frying
1 very large russet baking potato
Coarse salt
Coarsely cracked black pepper
Hardware:
Salad spinner
Electric fryer or heavy Dutch
oven fitted with a fat/candy
thermometer
Vegetable peeler
Splatter guard (optional)
Large slotted spoon
Draining rig
This application is even better suited to sweet potatoes. Since they contain a higher amount of sugar, they will burn quickly, so pull them when they hit a light mahogany. Oh and, if you don’t mind, leave the peels on.
Sauté: A Toss in the Pan
At the lighter end of the frying continuum there is the sauté. I say “the” sauté because it is both a method of cooking and a type of dish based on that method—“waiters” will say “a sauté of baby leeks,” while “servers” will say “sautéed onions.” Ah, nomenclature’s a cruel mistress.
Literally translated,
sauter
means “to jump” in French. A chef (yes, a French one) said that when trying to dance your way from the bar to your beach blanket on a summer day on the Riviera, the hot pebbles of the beach make you “sauter.”
So the logic here is flawed even if the method isn’t. While it’s true that food doesn’t cook in the air, maybe that’s the point. If it were to remain stationary on the bottom of the pan, the small pieces of food would probably reach a nice toastlike consistency while the inside was still raw.
What you need:
• high heat
• a heavy, wide pan with sloped sides
• a small amount of heat-friendly fat
20
• food cut into uniform shape and size
• seasonings (from salt and pepper to dried and fresh herbs, flavorful liquids such as vinegars and juices, and flavorful oils such as sesame and chile)
• tongs for playing with your food
The Pan
Without the right pan you cannot sauté, which is not to say you have to have a sauté pan. As discussed in the section on searing, a dense pan is going to heat more evenly than a light one, especially if it’s a metal sandwich of steel wrapped around a slice of aluminum or, even better (but more costly), copper. Since this pan needs to move during cooking, eschew cast iron unless you have anchor tattoos on each forearm and a girlfriend named Olive.
SAUTÉ TIPS
•
Always include aromatics such as onions, garlic, ginger and shallots, which release huge amounts of flavor and aroma when heated.
•
Don’t skip a final touch. Fresh herbs, a splash of wine or vinegar, even a teaspoon of orange zest bring a lot of flavor to the party in a hurry. Don’t add these early on, though, or their essential oils will go up in smoke (well, steam actually).
Since crowding the pan leads to stewing rather than sautéing, go for a wide-open plane of metal. I’ve got identical All-Clad sauté pans in both 10 and 12 inches. They cost a bundle but my grandkids will fight over them one day and darn it, that feels good.
Non-stick Sauté Pans
Yes, you can cook with amazingly small amounts of fat if you use the right non-stick pan, and that can be a good thing…maybe. The problem is, fat clings and conducts heat. Non-stick coatings (I’m a Teflon man myself) may conduct heat well but they do not cling. Therefore, there will be no flavorful browned bits on the bottom of the pan to deglaze and convert to sauce. And that’s just a shame. That said, if a sauce is not in the offing, non-sticks do a fine job.
In the last couple of years, Teflon has come under considerable fire for giving off dangerous fumes. I first became aware of this in 2003, when several bird owners filled me in on the fact that Teflon fumes can easily kill exotics like parrots and cockatiels.
Although the verdict is still out on the general health hazards of Teflon, I’ve decided to play it safe and have discontinued its use for high-heat cooking like sautéing.