Ukulele For Dummies (17 page)
Read Ukulele For Dummies Online
Authors: Alistair Wood
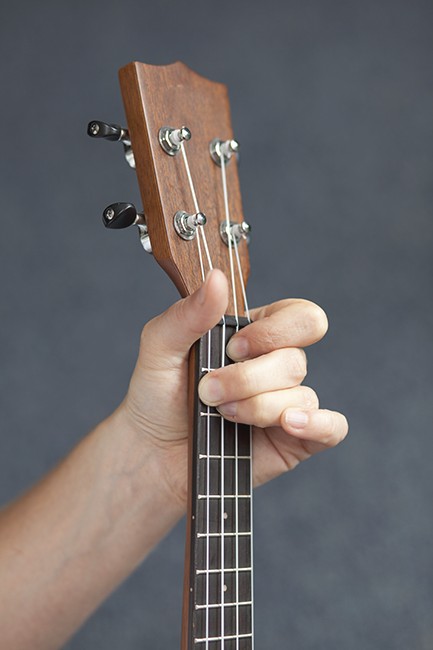
Figure 4-20:
How your fingers look when playing D minor.
Majoring in E minor
To play Em you have to venture farther up the fretboard than you have before. Start by putting your index finger on the A-string at the second fret. Then bridge over that with your middle finger to play the E-string at the third fret. Then bring your ring finger over that to play the C-string at the fourth fret. Take a look at Figure 4-21 to see the chord chart.
Figure 4-21:
The E minor chord chart.
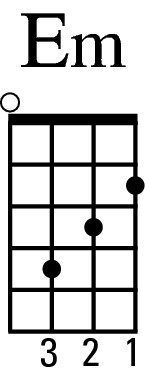
Because both your middle and ring fingers are arching over other strings, Em can be a tricky chord to get right. Pluck each string individually to make sure that it sounds clearly with no buzzing.
Playing your first minor-chord song
What better place to start exploring minor chords than with a song made famous by the king of gloom, Johnny Cash.
A good strum to use for this song is down, followed by three down-ups, as in Figure 4-22.
Figure 4-22:
The âWayfaring Stranger' strum pattern.

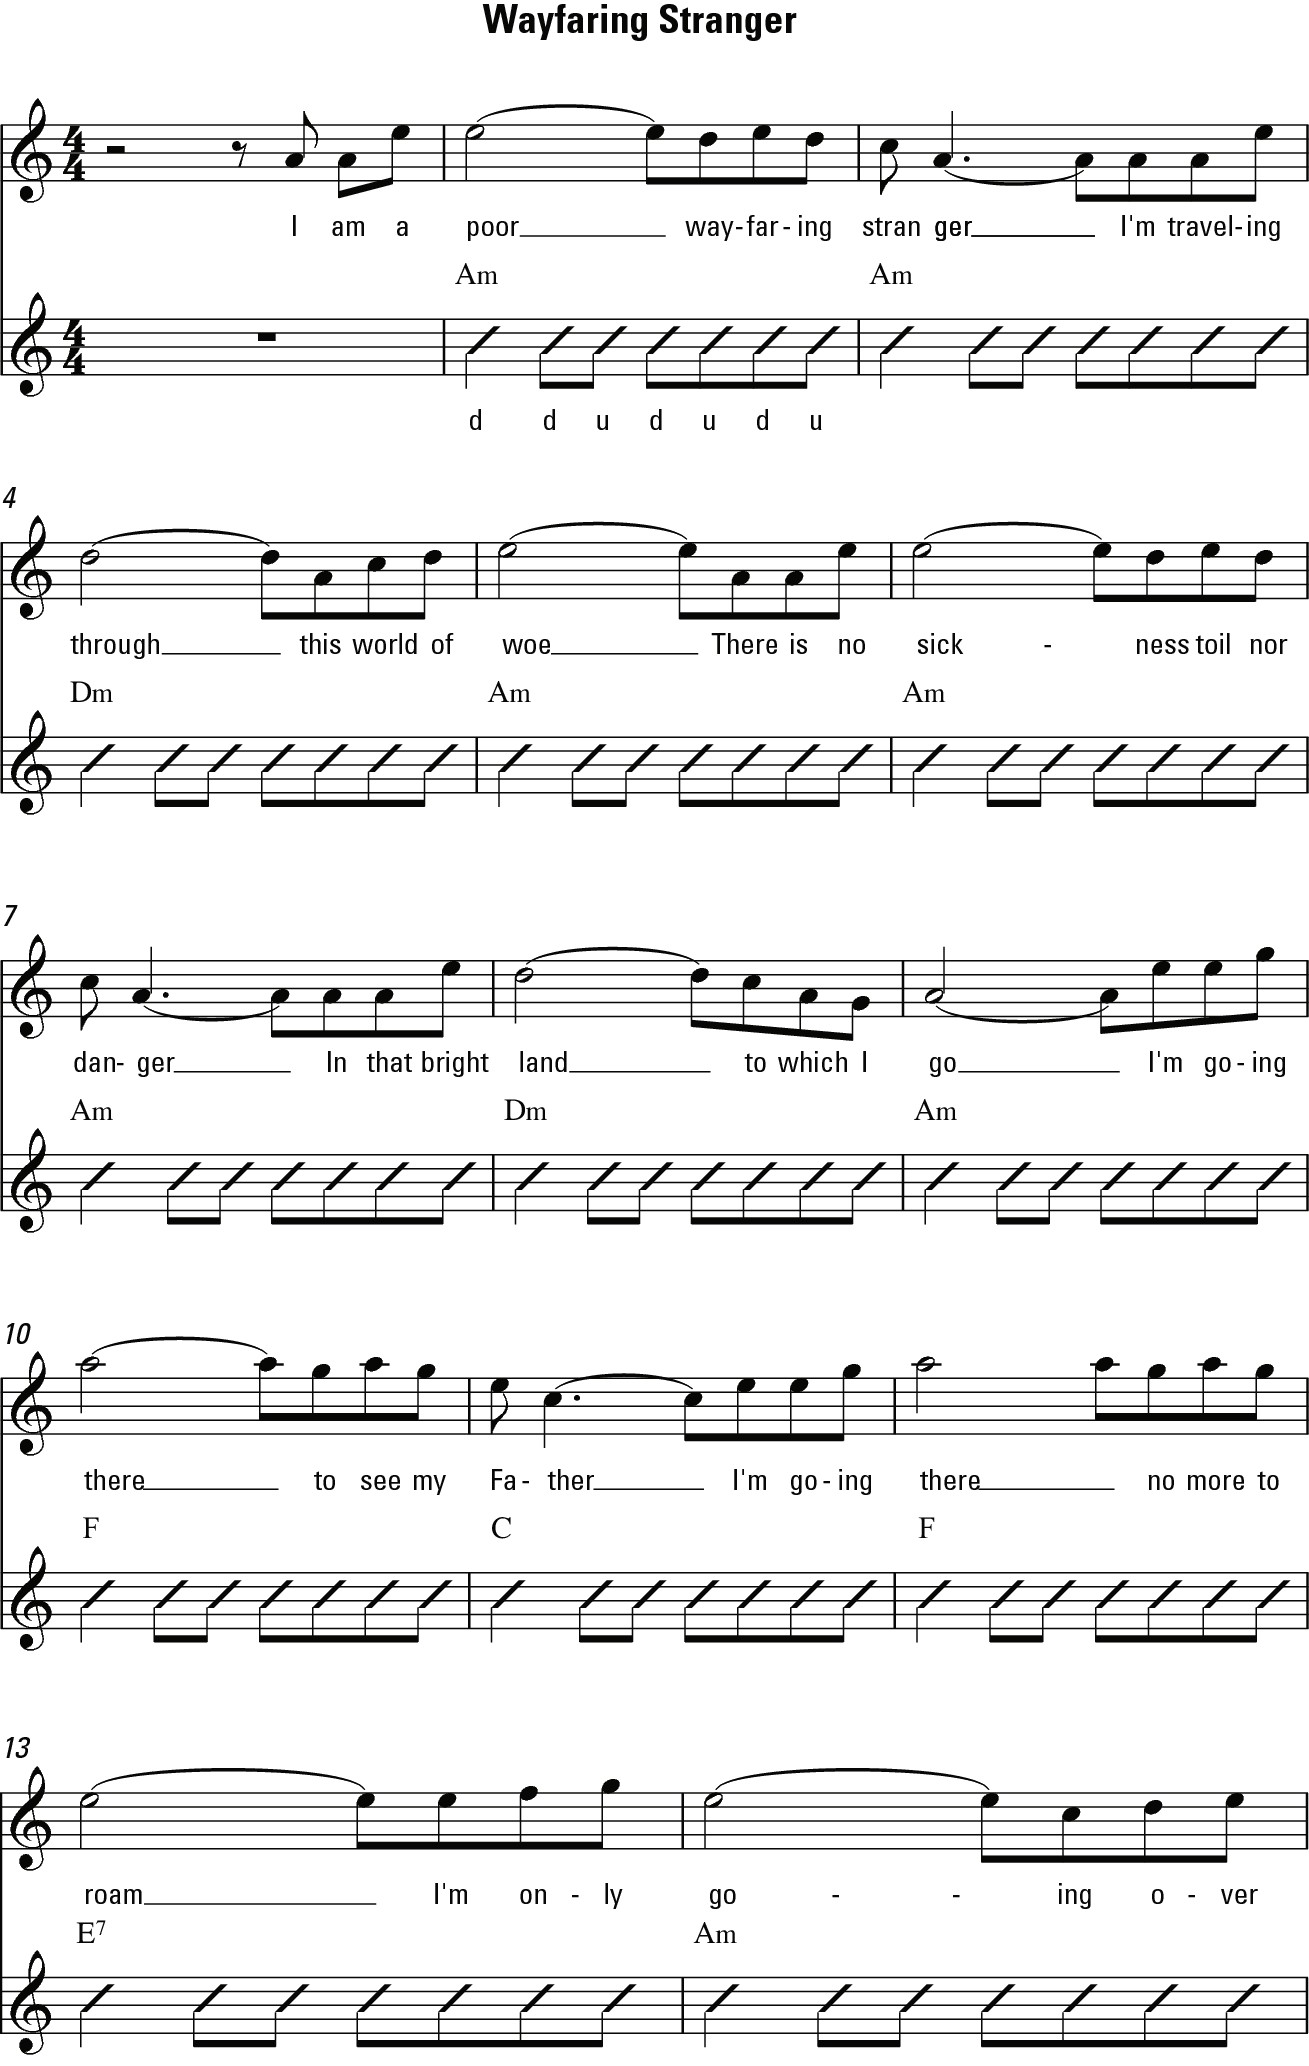
The song âWayfaring Stranger' uses a lot of the chords covered earlier in this chapter. Figure 4-23 goes over all the chords you're going to need.
 The trickiest part in the song is switching between F and E7. Give this chord change plenty of practice on its own. âWayfaring Stranger' (Track 5) is a slow song anyway, but take the song as slow as necessary to get that change smooth. Don't be tempted to speed through the easier changes and then be forced to slow down here. Take a look at Figure 4-24 to see the chord chart for this song.
Figure 4-23:
âWayfaring Stranger' chords.
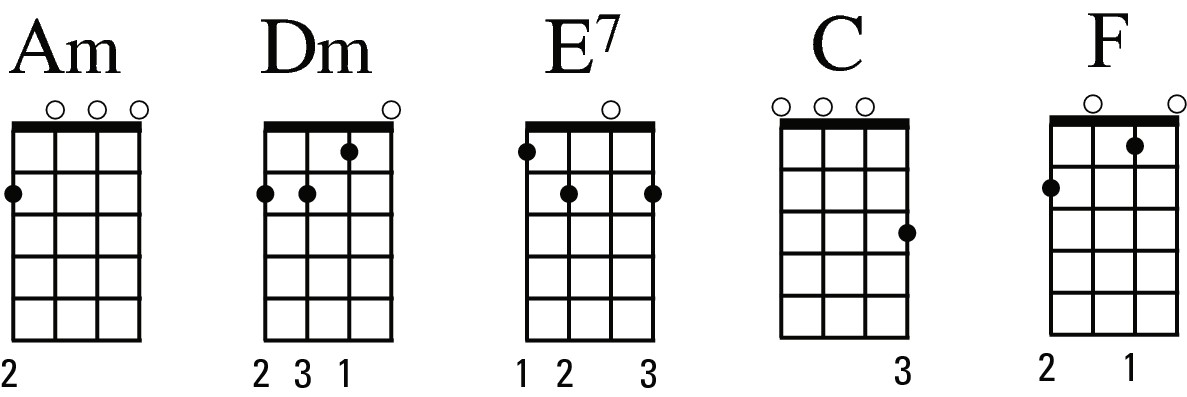
Figure 4-24:
âWayfaring Stranger' chord chart.

Chapter 5
Drumming Up More Strumming Patterns
In This Chapter
 Discovering the strumming pattern for all seasons
 Spicing up your strumming
 Strumming in different genres
 Playing when you don't know the pattern
T
he ukulele has a limited range on the fretting side, and so musicians need to ensure that their rhythm playing is interesting. For this reason, they place much more emphasis on strumming patterns and rhythm techniques than players of other fretted instruments.
In this chapter, I focus on the importance of rhythm and introduce you to some new chords and strumming patterns, including those of a few popular genres, to add to what you can discover in Chapter 4.
Pocketing the Ever-useful Swiss Army Strum
How often have you found yourself in the woods needing to open a bottle of wine, descale a fish and set the rivets on your bike chain? If you answered âall the time', you need a Swiss army knife: the tool of a thousand uses.
If, on the other hand, you answered ânever, I'm reading this chapter so I can strum my ukulele', you need the Swiss army strumming pattern: the strum of a thousand songs.
When you find yourself stuck for a strumming pattern, the Swiss army strum is a good one to pick because it fits so many songs really well.
 The pattern is shown in Figure 5-1 and demonstrated on Tracks 6 and 7. You can play it fast or slow.
Figure 5-1:
The Swiss army strumming pattern.

A few elements make the Swiss army strumming pattern more interesting than some others. The first is obvious when you write out what you're actually strumming: down, down-up, up-down. Yep, you've got two up strums together. So after the first up strum, you need to move your hand down without hitting the strings. This technique creates the need for a change in the strumming notation, and you get something that looks like Figure 5-2.
Figure 5-2:
Tied notation.
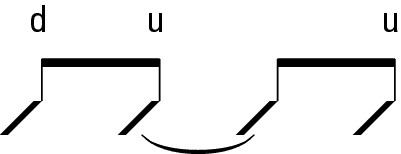
That little bridge in the middle is called a
tie
. It connects the two slashes so that you don't strum on the second note but hold the first one. Here, you're connecting two half beats and making one whole beat.
 Mnemonics (which I describe in Chapter 4) come in very handy in this situation. If you were counting, you'd have to count: âone, two and three and four'. But you'd have to remember not to strum on the three.
Applying mnemonics, you can just use âFlea' for the first strum. Then you have a half beat strum followed by a whole beat. For this pattern I like to use the phrase âG-String'. So you strum down on the âG' and up on the âString'.
Following that is the same half beat followed by a whole beat. But this time you strum up on the âG' and down on the âString'.
Before you try out the new song, you need to learn two new chords. The A chord is shown in Figure 5-3. Take a look at Figure 5-4 for a visual image.
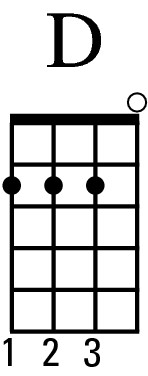
The second new chord, D, is shown in Figures 5-5 and 5-6.
Figure 5-3:
The A chord diagram.
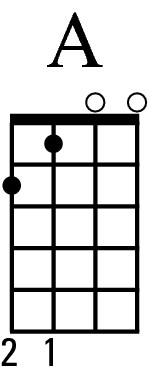
Figure 5-4:
What your fingers look like when playing the A chord.
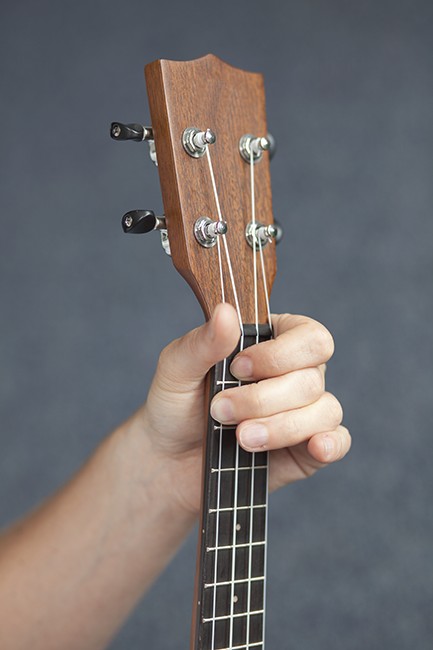
Figure 5-5:
The D chord diagram.
