Ukulele For Dummies (37 page)
Read Ukulele For Dummies Online
Authors: Alistair Wood
Rising and falling: The up and down pattern
 This pattern adds more complexity to the one in the preceding section by reversing the up pattern and going back down the strings. So you play the g, C, E then A in sequence just as before, then you come back down the strings playing E then C as shown in Figure 8-7 and on Track 28, Part 1.
This technique is slightly trickier because you don't have as much time to prepare your fingers. Your middle finger has to be ready to pluck again very shortly after the first pluck, and you need a bit of practice to become accurate.
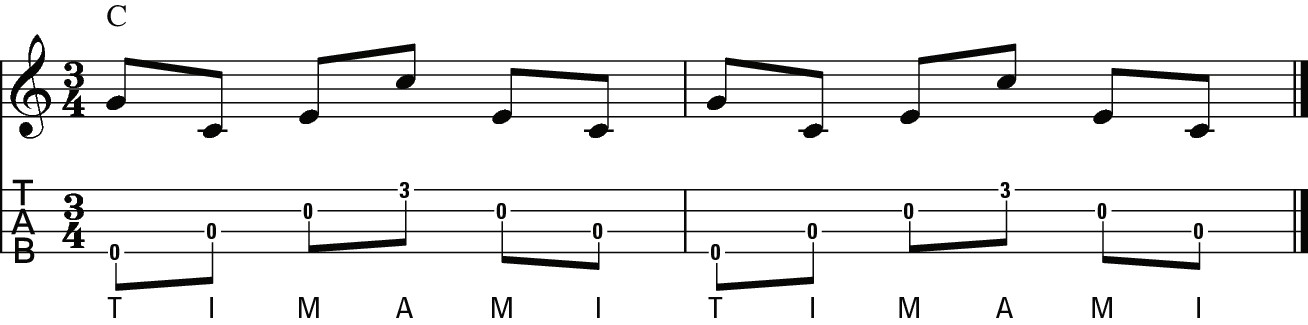
The up and down phrase takes three beats to complete; which can be counted âone and two and three and' (for a full description of 3/4 time, flip to Chapter 5).
Figure 8-6:
Up pattern with unusual chords.
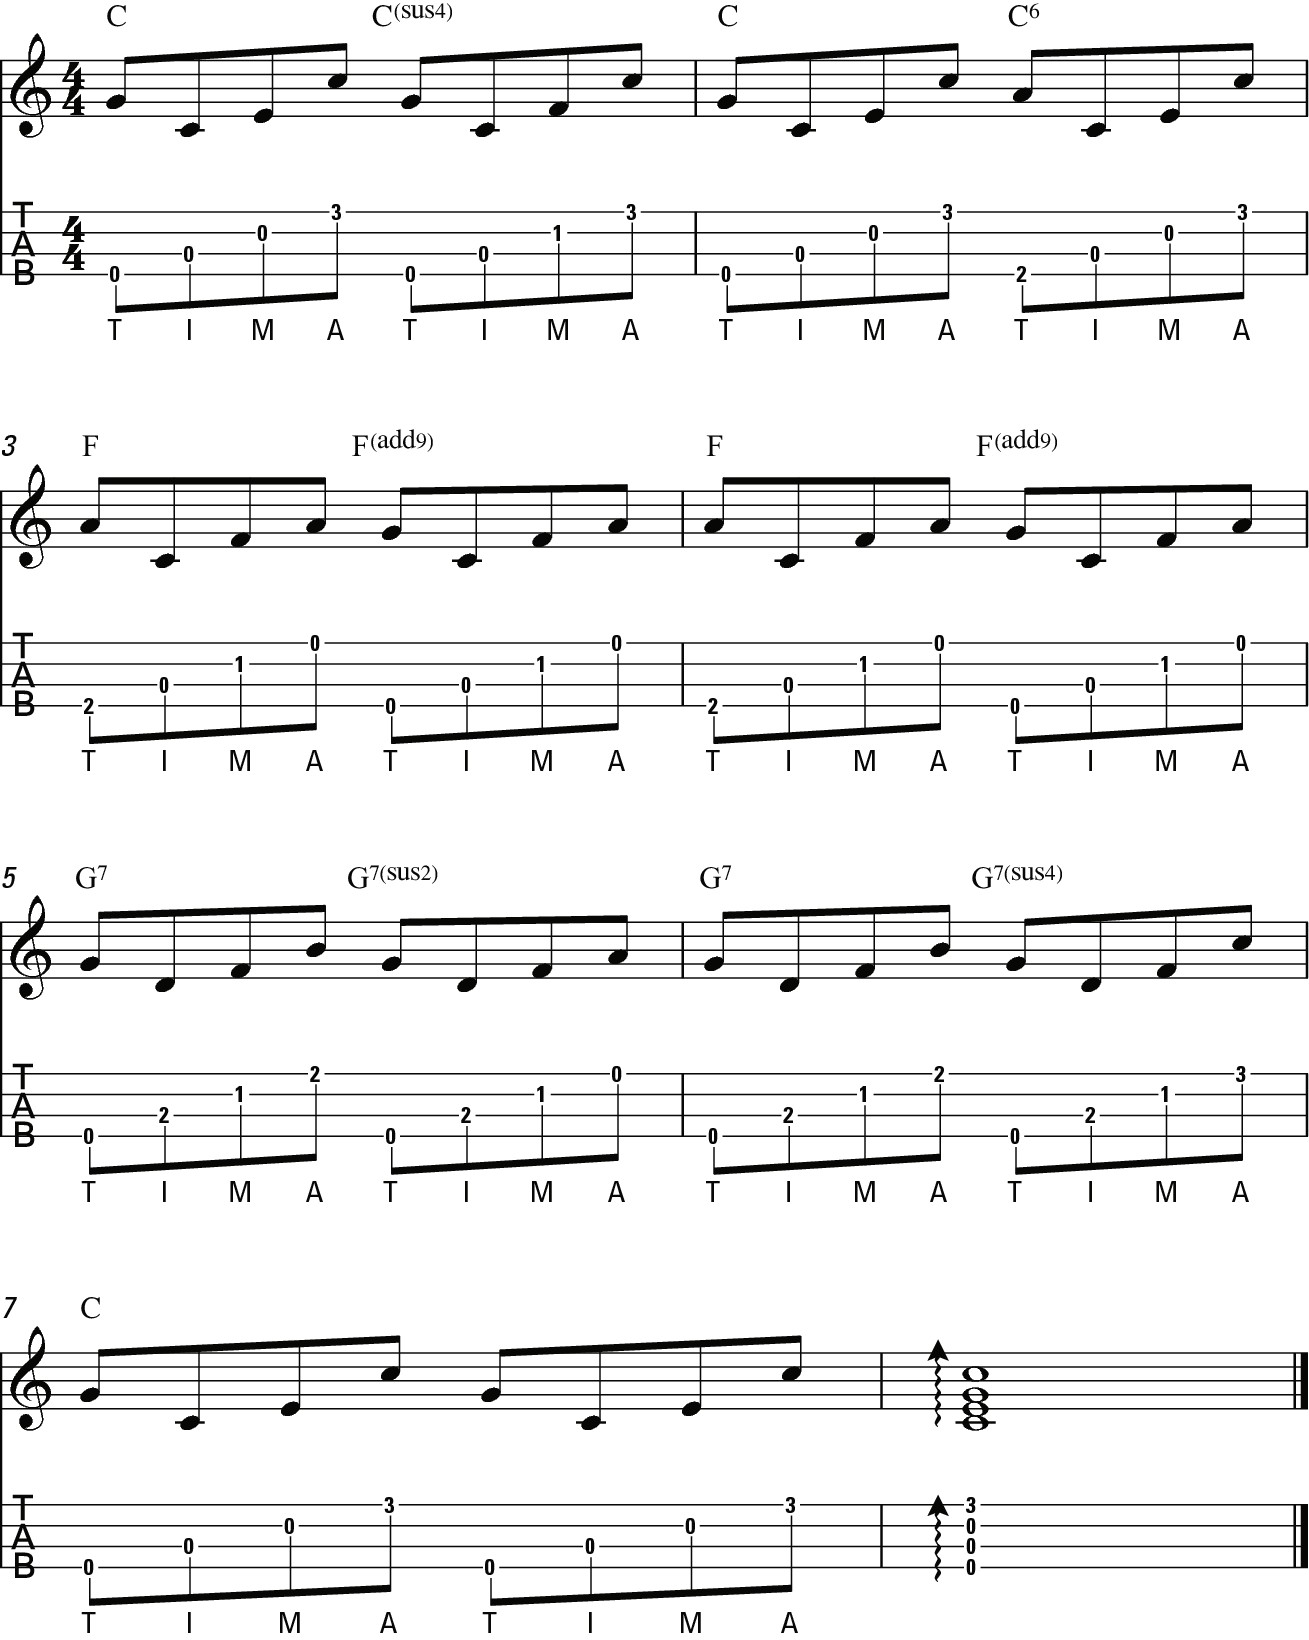
Figure 8-7:
Up and down pattern.
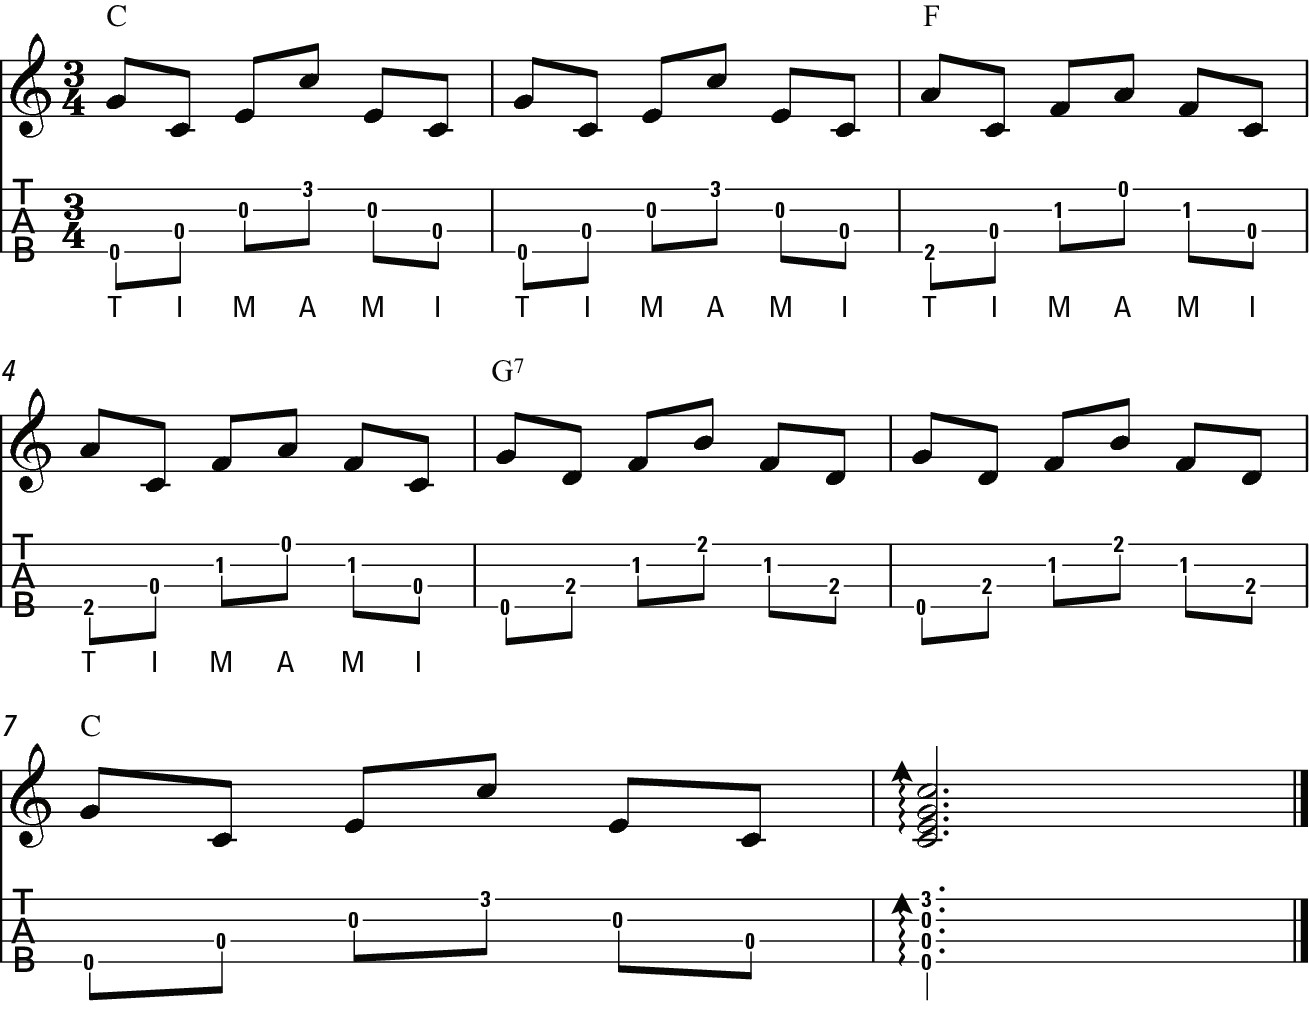
When you're confident playing the up and down pattern, add in the chord progression used in Figure 8-8. Listen to Track 28, Part 2 to hear how it sounds.
Figure 8-8:
Up and down pattern with chords.
Playing all together: The simultaneous picking pattern
The examples in the preceding two sections have you playing just one note at a time. The next pattern has two notes picked at the same time. This technique is very effective and one of my favourites. It creates a beautiful shimmering effect.
To play Figure 8-9, pick the g-string with your thumb at the same time as you pick the A-string with your ring finger. The picking follows the âdown' part of the previous pattern, playing the A, E and then C-strings. Track 9, Part 1 shows you how it sounds.
Figure 8-9:
Simul-taneous picking pattern.
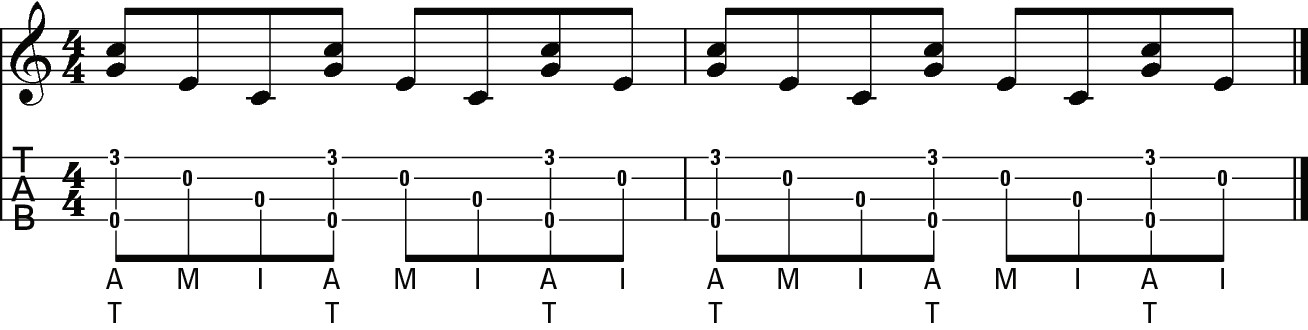
An interesting aspect of this pattern is the arrangement of notes: first, a group of three; second, another group of three; and then a group of two. This gives an emphasis to one of the off-beats (one of the âand' notes) in each bar. This is known as âthree against four', and it creates an interesting and unexpected colour to the pattern.
You need a bit of practice to get used to this technique, but the effort is well worthwhile.
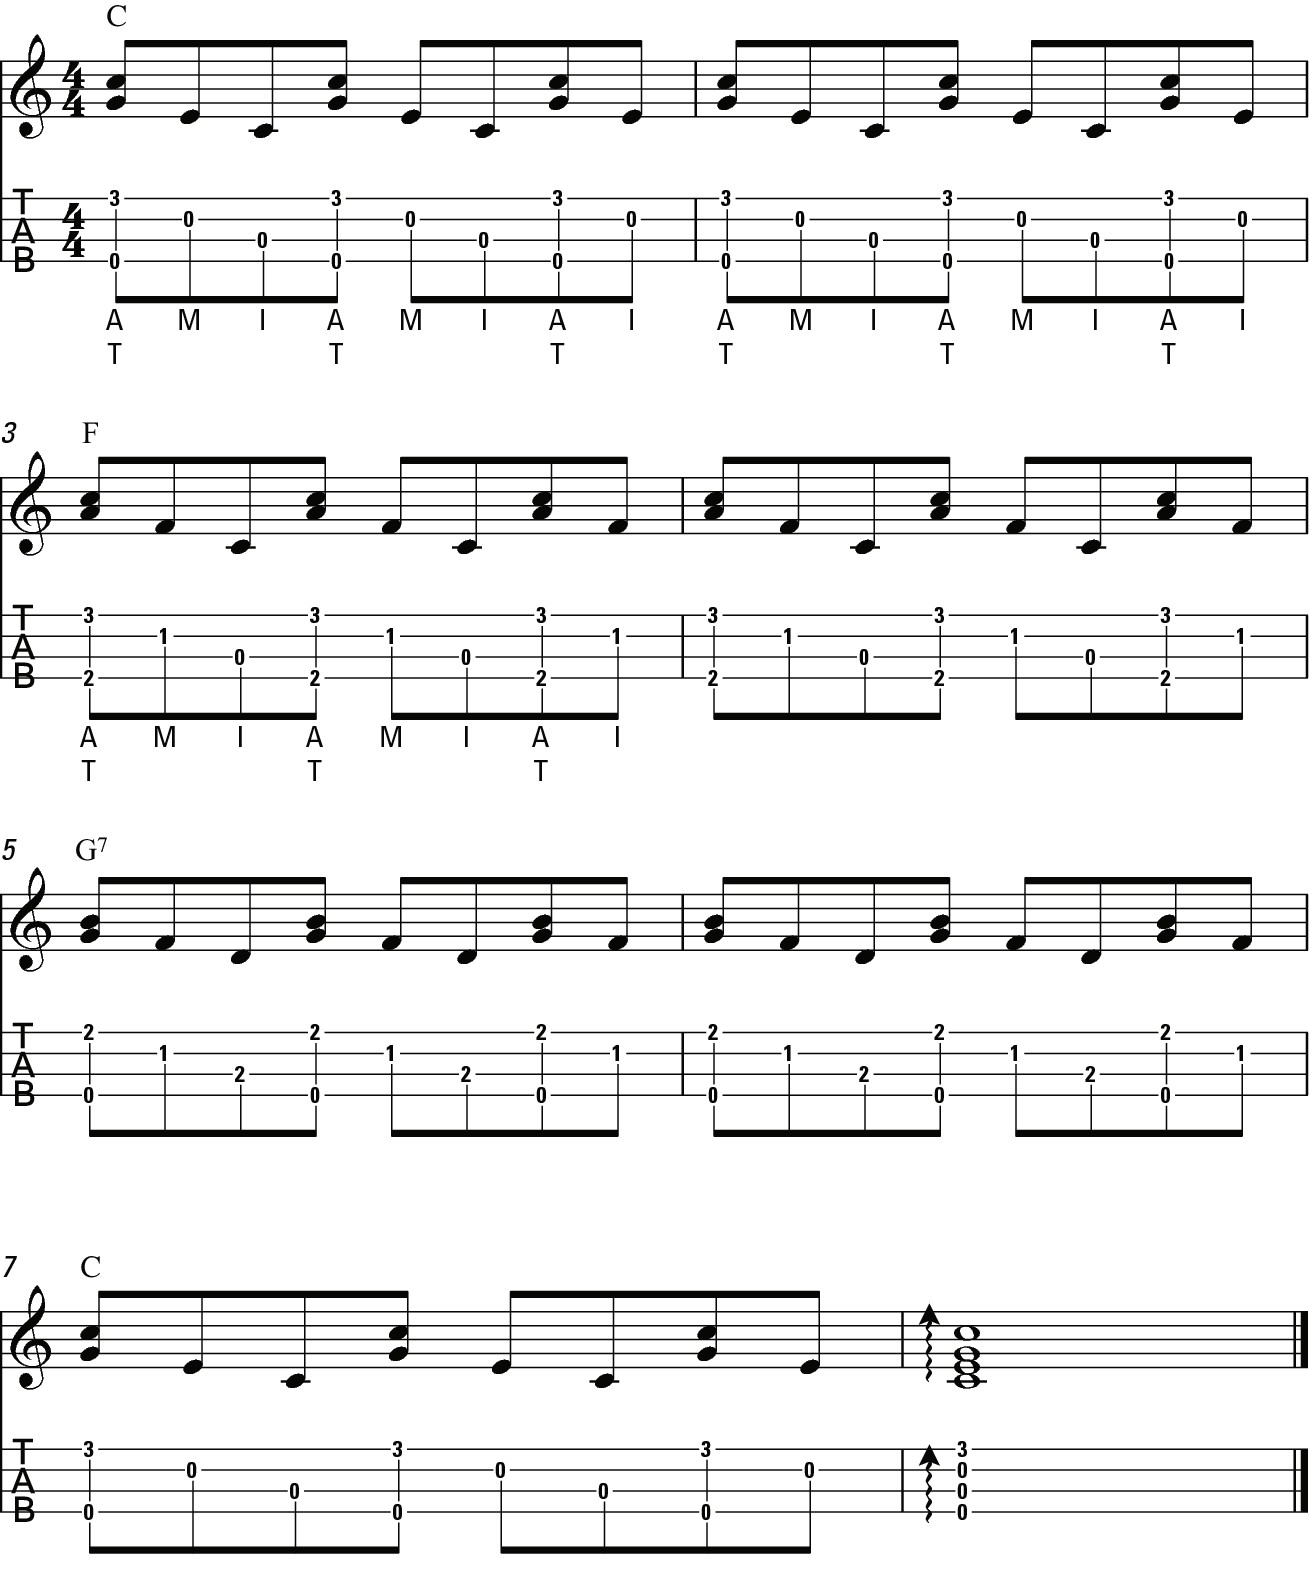
To play Figure 8-11, you need to use a slightly different version of the F chord. This new fingering is the same as that of the F chord in Chapter 4 except that you use your little finger to hold down the A-string at the third fret (see Figure 8-10). To prepare for this F chord shape, use your little finger to fret the C chord, which makes the changes between the chords much easier. The result is what you hear in Track 29, Part 2.
Figure 8-10:
F chord inversion.
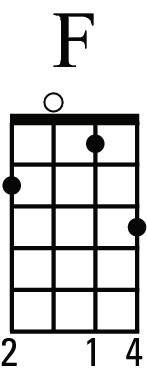
 Chords are made up of a certain set of notes; playing these notes in a different configuration gives you
inversions
of the chord. So the chord in Figure 8-10 is an inversion of the F chord. Even though it's the same chord, a variation like this gives a slightly different feel.
Figure 8-11:
Simul-taneous pattern with chords.
Using this pattern you can create little melodies on the A-string. Figure 8-12 has the familiar C, G7 and F chords on the g-, C- and A-strings but the notes on the top string move to create a melody line. Listen to Track 29, Part 3, for an example.