Happy Endings: Finishing the Edges of Your Quilt (5 page)
Read Happy Endings: Finishing the Edges of Your Quilt Online
Authors: Mimi Dietrich
Tags: #Crafts & Hobbies, #Quilts & Quilting

Adding Multiple Borders
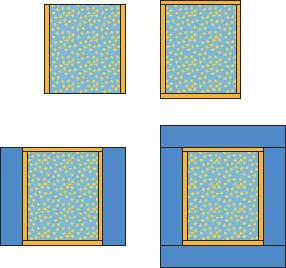
Quite often, quilts have more than one border, from a simple inner and outer border to more complex combinations. Multiple borders often graduate in size, becoming wider toward the outer edge of the quilt. You can overlap or miter the corners (or substitute corner squares), depending on the look you desire.
Overlapped Corners
1.
Measure the quilt top and cut the inner border strips, following the directions for “Adding Borders with Overlapped Corners” on
page 13
. Measure and cut the outer borders after you have applied the first border.
2.
Sew each border to the quilt one round at a time, sewing all four strips of the same fabric before adding strips of the next fabric. Press the seam allowances toward the outer edge of the quilt.
Mitered Corners
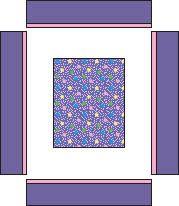
If you’re planning to add two or more borders to your quilt, you can sew individual strips of each fabric together to create the multiple border for each side of the quilt, and then attach the borders and miter each corner as a unit.
1.
Measure the quilt top and cut the border strips, following the directions for “Adding Borders with Mitered Corners” on
page 14
. Be sure to take into consideration the width of each border you’ll be adding, not just one.
2.
Sew the border strips together to make four complete borders, one for each side of the quilt.
3.
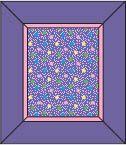
Treat these multiple-fabric borders as single borders and carefully sew them to the quilt top, following the directions for “Adding Borders with Mitered Corners.” As you fold, pin, and tape the miters, be sure to carefully align the individual border seams for perfectly matched corners.
Getting Ready
to Quilt
To ensure that the method you choose to finish your quilt works just as nicely as you planned, I’d like to share a few techniques for the quilting process to make sure your quilted project lies nice and square and that the raw edges are ready for whatever binding method you choose
.
Selecting the Quilt Backing
Choose a fabric for the back of your quilt that complements the quilt top. Repeat a fabric from the quilt design or find a print with the colors of the quilt. A solid fabric will show off the quilting design, while a print fabric will hide any flaws in your quilting. Do not use a bed sheet for the back of your quilt if you will be hand quilting. You will have problems stitching through the high thread count fabric.
M
IMI
’
S
F
AVORITE
I like to use print fabrics for the back of my quilts to complement the quilt design. When I hand quilt, I don’t worry what the quilting looks like on the back. The print fabric also “invites” me to pick up the quilt and stitch.
Piecing the Backing
The backing should be larger than the quilt top. For a small wall quilt or baby quilt, the backing should be at least 2" larger on all sides. For a large quilt, the backing should be 4" to 6" larger on all sides. If your quilt is wider than 40", you’ll need to piece the backing. The seam can be vertical or horizontal.
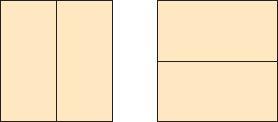
If you need two strips for your quilt backing, avoid placing a seam in the center of your quilt. A center seam will receive wear each time you fold the quilt, and it will eventually weaken.
1.
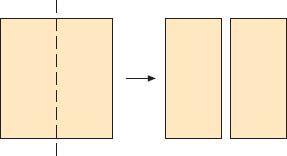
After cutting your backing fabric into two sections, cut one of them in half vertically.
2.
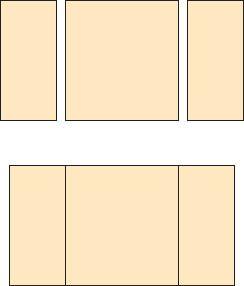
Sew the two narrower pieces to either side of the full-width backing piece.
3.
Press the seams open to distribute the thickness of the seams.
Happy Ending Hint
Some quilters like to use fabric scraps from the quilt top to piece a creative backing for a quilt. This is a great use of leftover fabric and adds interest to the back of the quilt.

