Happy Endings: Finishing the Edges of Your Quilt (8 page)
Read Happy Endings: Finishing the Edges of Your Quilt Online
Authors: Mimi Dietrich
Tags: #Crafts & Hobbies, #Quilts & Quilting
Making an Imitation Binding
After you have stitched the front and the back of the quilt together and have turned it right side out, you can create the look of binding along the edge.
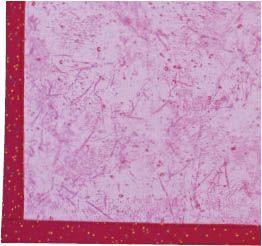
Sew a row of hand or machine quilting ¼" to ½" from the edge of the quilt to give the illusion of binding. The stitching also flattens the puffy edge. This effect looks especially nice when the backing fabric is the same as the border fabric on the front—it completes the illusion of an actual applied binding.
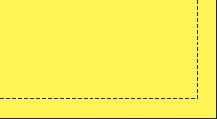
To give the appearance of wide binding, stitch a 1"- to 2"-wide border on your quilt before you finish the edges. Sew the front and the back of the quilt together by hand or machine, and then quilt in the ditch along the border seam. This last border will appear to be wide binding.

Appliquéing the Edges to a Border
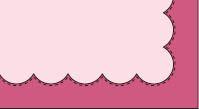
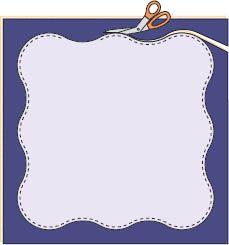
To create a very unusual finishing touch, you can appliqué the edges of a curved or scalloped quilt (such as a Wedding Ring quilt or one that simply has a scalloped border) to a straight border. Your quilt will still have that nice scalloped look, but you won’t have to bind the curved edges.
1.
Appliqué the curved edges to straight strips of fabric. For a smaller quilt, you could even appliqué the entire quilt top onto a square or rectangle of fabric, and then cut away the excess fabric beneath the quilt top.
2.
Sew the front and the back of the quilt together along the straight edges. Attach batting, trim, and turn right side out.
3.
Quilt in the ditch along the appliqué curves for a very special quilt finish.

Working with Sculpted Edges
Sculpted edges feature curves and angles that flow around the edge of the quilt. To keep these edges from stretching, do not trim the backing fabric until the edges have been stitched.
1.
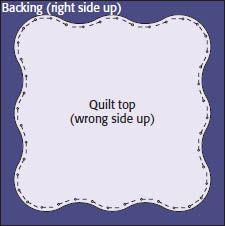
Cut the backing at least 2" larger than the quilt top, but keep the edges straight. Place the front and back of the quilt right sides together, with the quilt top on top. Pin the edges.
2.
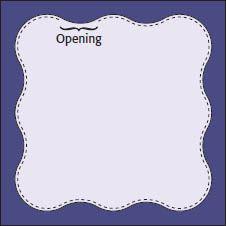
Sew a ¼" seam around the quilt. Leave an opening on a straight edge (or a gentle curve).
3.
Pin the quilt to the batting and sew the quilt to the batting on the same stitching line.
4.
Trim the batting close to the stitching; trim the backing, leaving a ¼" seam allowance. Turn right side out.
5.
Hand sew the opening closed. Machine stitch or hand quilt ¼" from the edge to accent the sculpted edges.
Finishing Edges with Backing
Some quilts appear to have binding along the edges but are actually finished by folding the backing fabric to the front, over the batting and quilt top. You can quickly and easily complete a project using this technique
.
Finishing your quilt with backing requires that you cut the backing larger than the quilt top. Because most quilters prepare their quilts with the backing already cut longer and wider than the quilt top, you don’t need to plan on additional fabric. With this method, the corners can be quickly overlapped or mitered for a finer appearance. In addition to being easy, this technique is an economical way to finish your quilt. You should be aware that edges finished this way, however, are generally not as durable as ones finished with double-fold binding. This method can put more wear and tear on the backing fabric.
That said, using the excess backing fabric to finish the edges is a great method to use if you do not have enough fabric to make binding, as long as your backing fabric coordinates with the quilt design. If not, you may want to reverse the process, turning the quilt-top fabric to the back of the quilt to create the finished edge.
Happy Ending Hint
Think about the use of your quilt when you are considering finishing the edges with the backing. It’s great for wall quilts but probably not durable enough for baby quilts or other quilts that will be washed often.

