Mac Hacks (15 page)
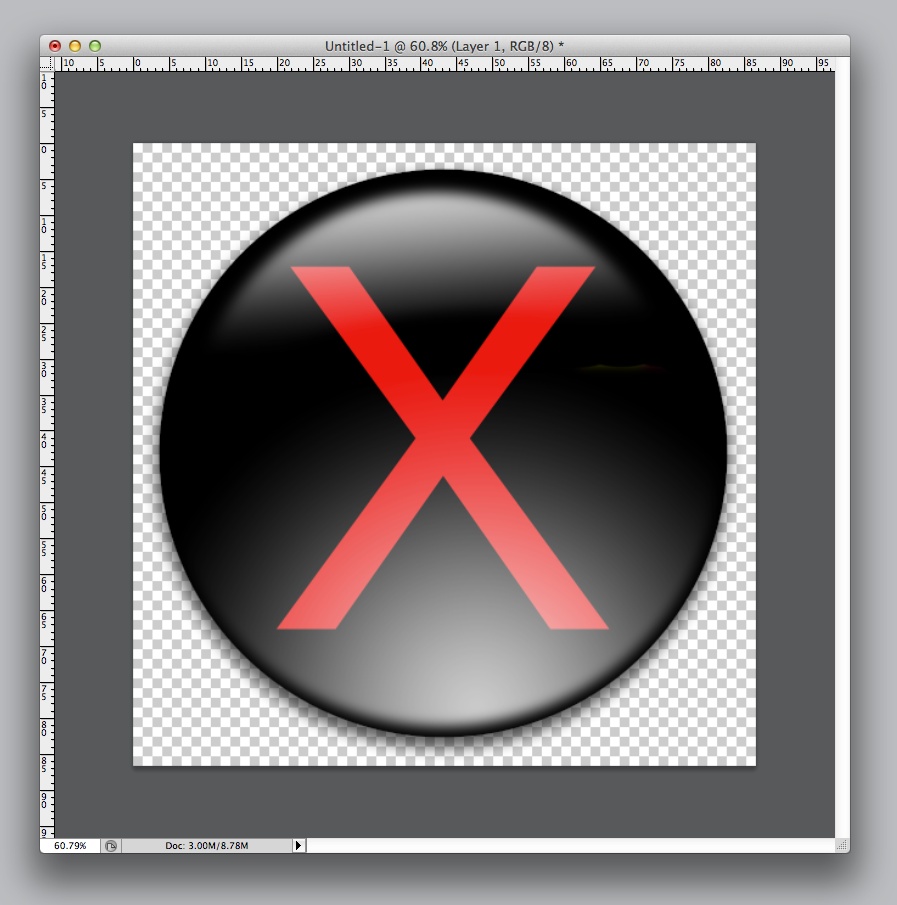
With the image complete and your eyes spurting blood from taking
in that much ugly, it’s time to turn this image into a proper icon. To
get started, resize the image to 1024×1024 (the maximum size for an OS
X icon) and then save the file in Photoshop’s native
PSD format.
After
you’ve created your image, all that’s left to do is to
turn the image into an icon. First thing you’ll need to do is save
your image as a TIFF file that’s 1024×1024 pixels. Then
you have to turn that TIFF file into an icns file.
You’ll need to use the Terminal to pull this off. Open Terminal and
type:
tiff2iconspathtofile/filename.tiff
Once you hit Return, tiff2icons (a command-line program) will
turn your TIFF into an icns file (the file type OS X wants for its
icons), generating a 32×32-pixel icon as well as an icon that is the
original size (1024×1024). If you’re just making icons to replace
icons you don’t like on your Mac, you can quit at this point. But if
you’re cranking out a high-level Mac application or if you’re doing
this for a friend, you’ll want to go the extra mile and crank out an
icon set
(a group of files with all the icons
sizes OS X likes built right in), too. Terminal
to the rescue once again! Type:
iconutilpathtofile/filename.icns-c iconset
This is another really simple command. It tells iconutil to take
the file you created with tiff2icons and convert it (that’s the-cpart of the command) to an iconset. When you hit
Return, iconutil turns your icns file into an entire icon set suitable
for regular Macs
and
those with Retina
displays!
Once the image you want to use is saved, you’re ready to use
it as an icon replacement if you so desire. To pull this off,
right-click (or Command-click) the
.psd
file
you just created and choose Copy from the contextual menu. Then fire
up Preview (found in the Applications folder) and choose “New From
Clipboard” (Command-N) in Preview’s File menu. Now hit Command-C to
copy the image. Next, right-click the file whose icon you want to
replace, and choose Get Info. Paste your new icon right over the old
one as described earlier in this hack. If you’re wondering why you
have to make a trip to Preview—why couldn’t you just cut and paste
directly?—the reason is that directly cutting and pasting between
the image file and the icon you want to replace results in an icon
without the transparency. You worked hard to get the transparency
right and a quick detour through Preview will ensure that the icon
behaves as you expect.
You’ve
got your icons to go! The easiest way to change a
program’s icon to the new
.icns
file is to open the program’s Resources folder and replace its
.icns
file with the new
.icns
file you created. (A program’s
Resource folder is inside its
.app
folder. For example, Safari’s resource
folder is located at
~
/Applications/Safari.app/Contents/Resources
. If
you want to see it the GUI way, Control-click the Safari icon in the
Finder and choose Show Package Contents.) Give the new file the same
name as the existing
.icns
file
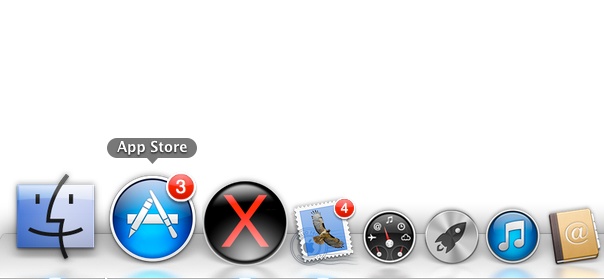
and drop it in the folder. For instance, if you were to replace
Safari’s
compass.icns
file with
one you created, the result would look like
Figure 3-30
. Just imagine how
many Docks can be ruined with your new creation!
steps.
. Hacks for a More Informative
Mac
Using your Mac is a two-way street: you create things and send them to
the larger world and, in turn, you can see what’s going on just about
anywhere and digest it in front of your computer. What if you want to get
the information that’s important to you in a more passive manner? You could
use something like News Notifications (which costs 99 cents in the App
Store) and have Notification Center notify you of stories, but perhaps that
seems disruptive. What if you want to see information that doesn’t demand
your attention and appears on your desktop unencumbered by Finder windows
and desktop items? You can have all that with just a little bit of effort
that pays off over time as you use your computer. This chapter explains
how.
. Quit the Finder
The
Finder is just another program, so why run it if you’re not
using it? If you’re using the Dock, Spotlight, or a third-party launcher
as your primary method of navigating to and launching files, the Finder
isn’t doing you much good. Don’t be frustrated by the lack of control over
the Finder—add an option to
quit.
The Finder in OS X is likely both the most-used program and the most
loathed. The Finder seems perpetually stuck halfway between behaving like
the Finder in Mac OS and behaving like a web browser. Fortunately,
there are many options to use instead of the Finder.
Users
who like raw speed can rely on Quicksilver (
http://qsapp.com
). Those
in love with Spotlight are more than happy to launch all
their applications via everyone’s favorite magnifying glass. And those
inclined to use Terminal don’t ever have to use the Finder; they have
complete control.
If you’re one of the people who use an alternative to Finder, you’re
probably wondering why your Mac is burdened with the overhead of the
Finder program (yes, the Finder is just a program) if you don’t use it on
a regular basis. A good question, and the simplest answer is “because the
Finder is a hassle to turn off.” Sure, you could always kill the Finder
via Terminal, but if you’re not already using Terminal, that can be big
hassle, too. It would be better and easier if the Finder had a quit option
in its File menu. So let’s add one.
To
add a quit option to the Finder menu, you need to edit the
Finder’s PLIST (property list) file. (There’s lots more about PLIST files
in
[Hack #6]
.) The one you’re looking for lives
here:
/Users/username/Library/Preferences/com.apple.finder.plist
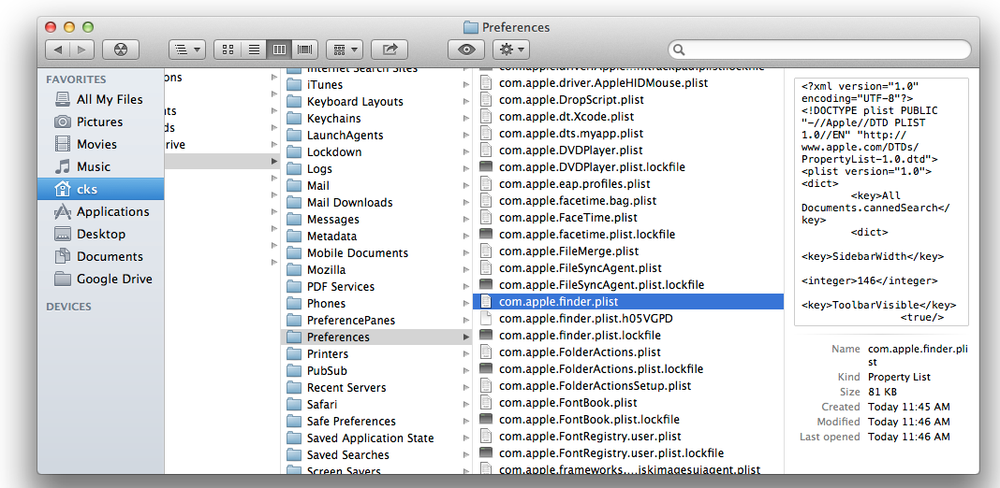
.
That’s the file named
com.apple.finder.plist
in the Preferences
folder found in the home Library folder (see
Figure 4-1
). Be sure to back up
the file by making a copy of it before you proceed.
Note: If you have trouble finding the Library folder (in Lion and
Mountain Lion, it’s hidden by default), see
[Hack #4]
.
With the file located and backed up, you can safely work on it while
it’s in your Preferences folder. Open the
com.apple.finder.plist
file using a property
list editor, an application specifically designed to edit PLIST files. If
you’ve installed Xcode (which is free from the App Store)
that will likely be your default PLIST editor. If you’re not happy with
Xcode (it’s is a little bit of overkill for this hack), a quick search on
Version Tracker
will
yield a variety of options.
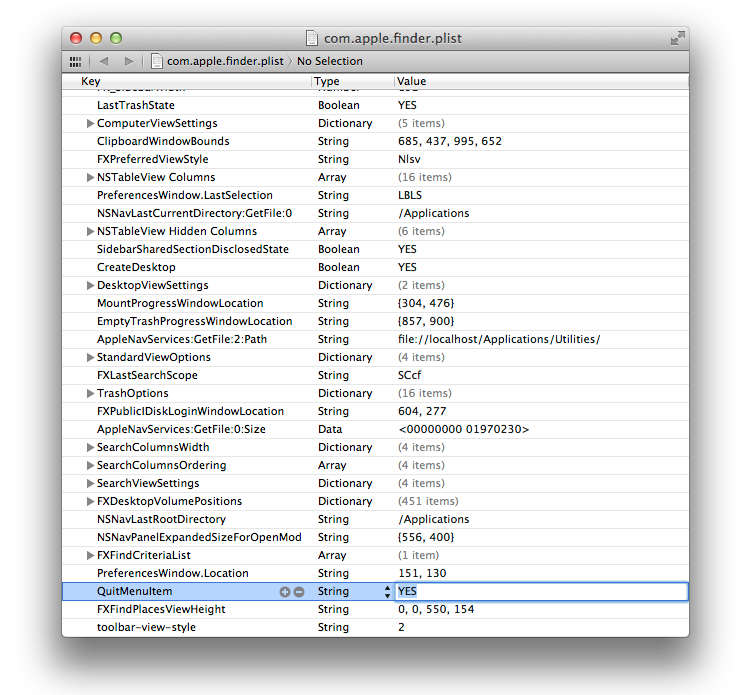
After you’ve opened the file in your preferred property list editor,
look for the line that readsQuitMenuItem. Change NO to YES, and you’re on
your way to quitting the Finder (see
Figure 4-2
). After you make that
change, save the PLIST file.
Note: If you don’t see theQuitMenuItemoption, don’t be alarmed. Simply
perform the following Quick Hack instead, which uses Terminal rather
than a property list editor.
Write a PLIST File
The
Finder’s PLIST file is interesting to look at and
includes fun stuff to play with, but digging through folders and
scanning for PLIST files isn’t strictly necessary. You can accomplish
the same task using the Terminal. Simply launch Terminal and type this
command:
defaults write com.apple.finder QuitMenuItem YES
Then hit the Return key.
That’s it; you’re done. To see the change, you’ll need to log out of
your account and log back in or, in the Terminal, type:
Killall Finder
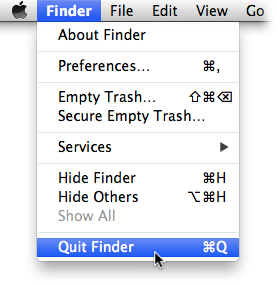
Then, open the Finder menu, and notice the Quit option shown in
Figure 4-3
.
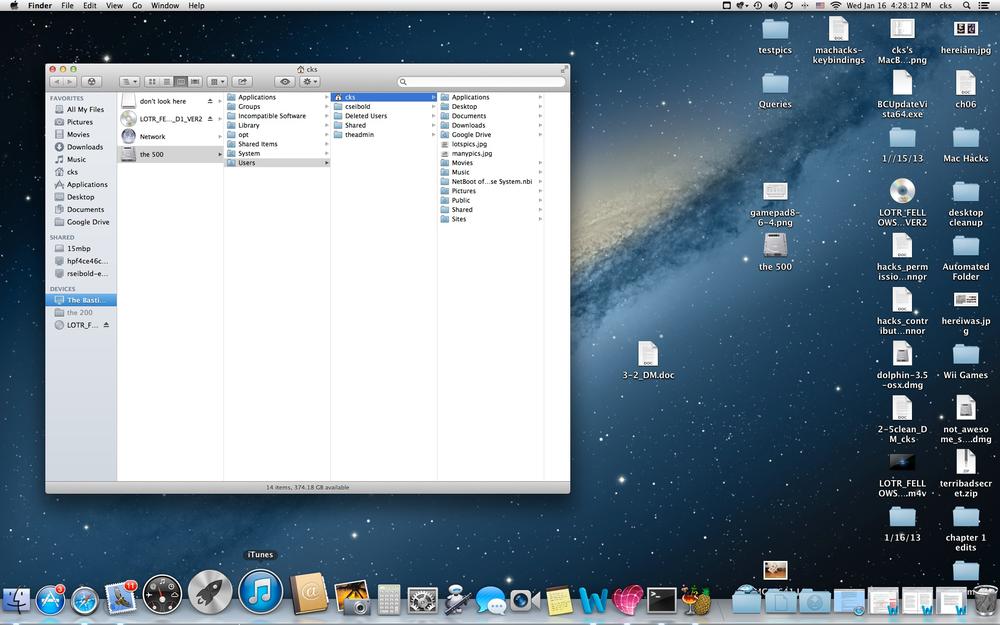
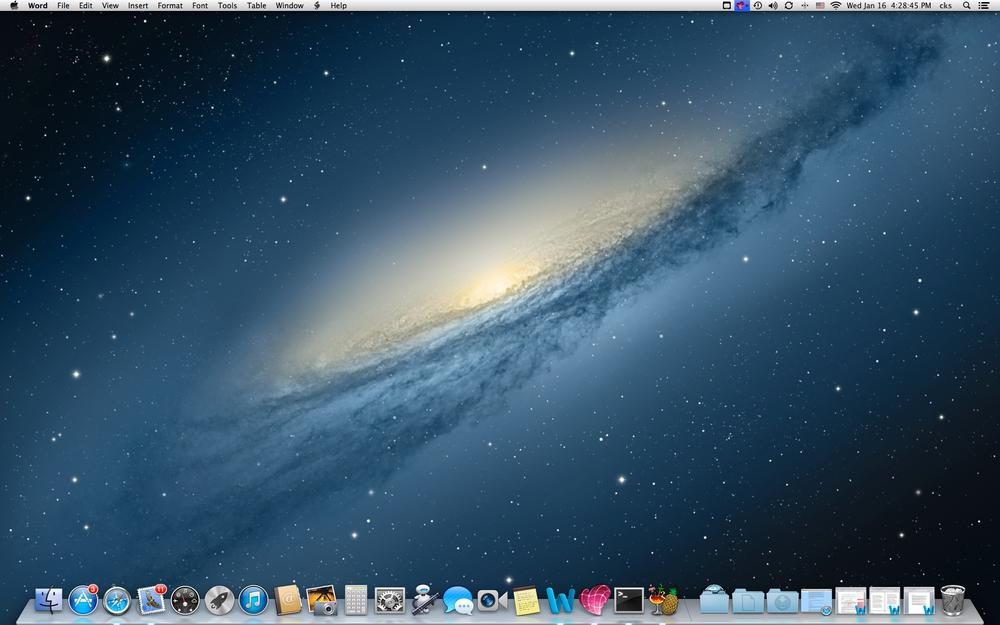
After you select the newly added Quit option, you’ll see the usual
menu bar at the top of the screen and the Dock at the bottom, but the area
once reserved for Finder windows and the desktop (
Figure 4-4
) will be completely
blank except for a desktop background (
Figure 4-5
). That isn’t a
surprise: the desktop is
controlled
by the Finder,
and each icon you see on the desktop is, in reality, another window your
Mac is forced to render. So even if you don’t quit the Finder, keep that
desktop clean!
Finder...
When performing this hack, many people get suddenly scared because
all their files and drive icons disappear from the desktop without
warning. Don’t worry: nothing has been deleted. You just can’t
see
them because the Finder is no longer running.
Think of it as an instant desktop cleanup for those of us who have too
many files lying around.
There are going to be times when you need the Finder. Spotlight is
great for finding files if you know what you’re looking for, but if you
just want to randomly wander through your file hierarchy, Spotlight isn’t
going to do the trick. To get the Finder up and running again, just click
the Finder icon in the Dock, and the Finder will spring to life ready to
serve until you quit it again.
If you decide that you can’t live without an always-on Finder, you
can easily return the Finder back to the original state. You can retrace
the earlier steps of finding the proper PLIST and then changing YES to
NO. Or, as before, you can use the Terminal instead of a property list
editor. Simply type this:
defaults write com.apple.finder QuitMenuItem NO
As soon as you hit Return, the PLIST file is changed, the Quit
option won’t disappear from the Finder’s menu until you log out
or
restart.
. Move a Widget to the Desktop
Tired
of switching to Dashboard just to get the latest stock
prices or check the weather? Move that much-loved widget to the
desktop.
Dashboard, once a huge selling point for OS X, is becoming more
irrelevant with every iteration of OS X. But sometimes a widget is what
you need: not too much power and not too little. Take, for example, the
Stock widget. This nifty widget, which first shipped with Tiger,
beautifully and informatively displays the current price of your financial
holdings. With money on the line, stock prices are something that people
like to check with obsessive frequency. Sure, watching shares of the
company you own skyrocket and plummet can be nerve-racking, but it’s
information you want to know.
The most obvious thing to do is constantly hit the Dashboard
shortcut key (quick aside: you can assign a different shortcut key by
going to System Preferences→Mission Control) or repetitively launch
Spaces. However, constantly invoking Dashboard can get a little mundane.
What we need is a method to move the widget from the Dashboard to the
desktop. You can either search the Web for a program that does that for
you, or you can save time and money (plus feel a little hackerish) by
doing it yourself.
The first thing to do is to wander over to System
Preferences→Mission Control and uncheck the box next to “Show Dashboard as
a space” (
Figure 4-6
).

hack.
Once that task is complete, it’s time to use Terminal. Launch it and
then enter the following innocuous line:
defaults write com.apple.Dashboard devmode YES
Next, hit
Return. At this point, you’re probably wondering why
nothing seems to have changed. The truth is that plenty has changed, just
nothing you can see. You’ve entered Dashboard’s Developer mode—a
convenient way to test and tweak widgets without invoking
Dashboard.
There’s one more thing you need to do before you can get that
wonderful widget onto your desktop: you need to kill the Dock. The most
obvious way to do this is to log out and log back in, but that has the
disadvantage of killing any
other
applications that
are running. Since you used the Terminal to enable developer mode, why not
use it to terminate the Dock, too? Here’s the simple one-line
instruction:
$ killall Dock
Your windows might jump around a little after you hit Return, but
the Dock is the only process that suffers. Once the Dock reappears, the
protocol to get a widget onto the desktop is fairly simple even if it does
take the slightest bit of manual dexterity.
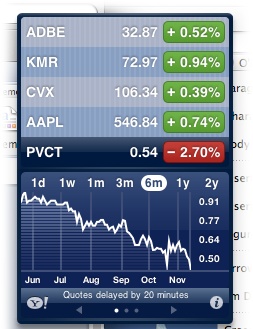
Fire up Dashboard using the method of your choice (pressing the
Dashboard key, clicking the Dashboard icon in Dock, or using the Mighty
Mouse scroll ball), and then click and begin dragging the widget you want
to move to the desktop. Now it’s time for your inner video-gamer to come
out: while you’re dragging said widget, press
and
hold
the Dashboard shortcut key (exactly which key that is
depends what you have it set to in System Preferences→Mission Control),
and then release the mouse button. The Dashboard disappears, and the
widget now resides on your desktop (
Figure 4-7
). (If you mess up,
the widget disappears from Dashboard but doesn’t appear on your desktop;
to get the widget back and try again, launch Dashboard and click the + at
its lower left.) Repeat for as many widgets as you like or as many as your
screen will hold. You can reverse the process by starting to drag the
widget from the desktop, then pressing the Dashboard key, and finally
releasing the mouse button.
Always. Hope you have a big screen...
Naturally, there are some downsides to having widgets running all
over your desktop. The first thing you’ll notice immediately is that the
widgets “float” above all the other windows. Not a big deal if it’s a
small widget or you have a 30-inch monitor, but you give up a certain
amount of screen real estate until you close the widget. Another
ramification of widgets floating on the desktop is that they’re constantly
using your computer’s resources. Ideally, Dashboard widgets only suck the
computing power down when Dashboard is running (though there have been
reports to the contrary in the case of some poorly designed widgets), but
if the widget is always running, it’s always affecting system
performance.
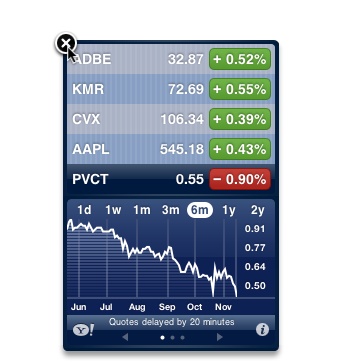
After
a while, you might get bored with the widget you moved to
the desktop, so you’ll want to know just how to get it back
off
your desktop. If you want to take individual
widgets off the desktop, the solution is simple but less than intuitive.
Simply press the Option key while pointing your cursor in the general
vicinity of the widget. A bubble with a white X in its center appears at
the upper left corner of the widget (
Figure 4-8
). Banish the widget by
clicking the X (this trick works in Dashboard as well).
Killing
a widget in this manner also removes it from Dashboard, so
the next time you want to use the widget in Dashboard, you’ll have to find
it among the available-but-uninstalled widgets and drag it back onto the
Dashboard playing field. If you wish to return your system back to the
state in which Apple shipped it to you, simply repeat the procedure
outlined earlier for entering Developer mode with Terminal, but change YES
to NO, like this:
$ defaults write com.apple.Dashboard devmode NO
You’ll still have the widgets you liberated on your desktop (kill
them with the Option key as mentioned earlier), but you won’t be able to
add new ones to your desktop. Your Mac is just like it was when you
started.
As
great as Dashboard is, some folks just don’t like it. And
if you don’t like it, there’s no legitimate reason to keep it around
taking up Dock space, using a valuable function key and gobbling up
valuable system resources. Sure, you’ll be killing one of OS X 10.4’s
most hyped features, but Apple is up to 10.8 now and no one develops
widgets anymore. Plus, this is a completely reversible process, and
there’s no reason to run Dashboard all the time if you never use
it.
You’d think that quitting Dashboard would be easy—but you would be
wrong. Simply removing the Dashboard icon from the Dock frees up a
little more Dock space but still leaves Dashboard running in the
background. To
truly
kill Dashboard and keep it
from restarting every time you restart your Mac, it is time for a trip
to the Terminal:
Open a Terminal window and enter the following command:
$ defaults write com.apple.dashboard mcx-disabled -boolean YES
As always spelling, spacing, and capitalization all
count.Hit Return.
You’d think that would be enough to get rid of Dashboard—but you
would be wrong again. At this point, you’ve set the stage for killing it
(it’s at the gallows, so to speak), but you haven’t pulled the lever. To
fully rid yourself of the Dashboard, you have to restart the Dock by
typing the following into a Terminal window:
$ killall Dock
The Dock restarts and, unless you investigate by looking at the
Activity Monitor or repeatedly hitting the Dashboard key, you won’t be
able to tell that Dashboard ever existed.
At
some point you’re going to hear about a great new widget
and want full Dashboard functionality back. Don’t fret: all the steps
described above are easily undoable. To get Dashboard running again,
open a Terminal window and enter the following command:
$ defaults write com.apple.dashboard mcx-disabled -boolean NO
Naturally, you’ll need to follow that command up with:
$ killall Dock
Dashboard returns to whatever state it was in when you killed
it: the widgets you were running will be running again, and widgets
you moved to your desktop will reappear.
To put the Dashboard icon back in the Dock, all you need to do
is open up the Applications folder in a Finder window, locate the
Dashboard application, and then drag Dashboard’s icon back to the
Dock.