Making Artisan Cheese (10 page)
Read Making Artisan Cheese Online
Authors: Tim Smith
Cheese Cloth or Butter Muslin:
The cheese cloth found in a supermarket has a very loose weave, making it suitable for only fresh cheeses. The advantage is that it is readily available and very inexpensive. Butter muslin is the alternative. It has a much tighter weave, is stronger, and is reusable as long as you rinse it in your sanitizer solution after use. The only drawback to butter muslin is that it is available only at cheese supply stores or online, so if you decide to make cheese on the spur of the moment you may be out of luck. For the basic cheeses included in this section, I have found that if I double over my inexpensive cheese cloth, things work out fairly well. However, when you move into the more advanced stages of cheese making, it is better to bite the bullet and get the butter muslin. Don’t frustrate yourself by losing some potentially good cheese over cheap cheese cloth.
Thermometer:
You will need a dairy thermometer; a candy thermometer will not work, because its temperature range is too high. An instant-read thermometer is sufficient, or you can use one that will attach to the side of the pot for a constant reading. If you want to go high-tech, an electronic, digital thermometer is a real winner because it has an alarm for precise settings. When using a double boiler, it is a good idea to have two thermometers going at the same time; this will give you better control over your milk temperature.
Although cheese as a food is generally safe to consume, it does have the potential to produce serious food illness, so it is best to follow basic sanitation procedures when making your own.
Techniques for Making Fresh, Soft Cheeses
The following steps for making fresh, soft cheeses are fairly simple. These cheeses are not molded or aged, and in the case of yogurt cheese, there is no need to heat the ingredients.
Curding Milk: Acid Curd and Cultured Milk
In making any fresh cheese, the first major step is to curdle the milk, which separates the solids and liquids, so the liquid (whey) can be drained off. There are two methods of accomplishing this: the first is to use an acid, typically in the form of vinegar or citric acid; the second involves acidifying the milk with bacterial cultures. As a general rule, acid-curd cheeses are the fastest to make: they can be made in as little time as it takes to boil milk, which makes them an ideal first cheese to attempt. The acid-curd fresh cheeses included here are paneer and lemon cheese.
When making an acid curd cheese, begin by placing a cooking thermometer into the top of your double boiler, add water to the base, and set the top in place. Turn the burner to a medium setting. In the top of the double boiler, heat your milk slowly, for twenty to thirty minutes, until it reaches 170°F (77°C). Just as it reaches the target temperature, remove the top of the double boiler and set it into a basin of ice water to cool, adding ice to the basin as necessary to bring the milk to 70°F to 72°F (21°C–22°C). Remove the pan from the basin and wrap a towel around it to maintain the temperature. Add the starter culture your recipe calls for, and slowly stir to mix. Set the lid on the pan and allow the mixture to sit at room temperature for the length of time your recipe directs.
When making a fresh cheese with starter cultures, you will also need a double boiler, but the milk will be heated to a lower temperature, generally below 100°F (38°C) (check each recipe for the specific temperature). When you have reached the target temperature, add the amount of culture called for, stir, and wait for the curds to form. Cultured fresh cheeses come in many different varieties; the ones included here are chèvre, quark, yogurt, yogurt cheese, cream cheese, crème fraîche, and cottage cheese.
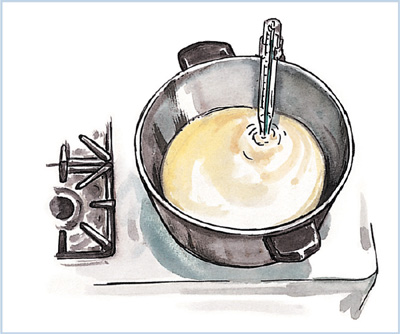
TOOLS
Cooking pan, or double boiler
Cheese thermometer (an instant-read thermometer, or any thermometer that is calibrated to read in 2°F (1°C) increments)
Stainless-steel stirring spoon
Colander
Cheese cloth or a loose-mesh kitchen towel
Catch bowl
Draining Curds
Line a colander with cheese cloth and place a catch bowl underneath. Use a piece of cheese cloth that is large enough to cover the cheese when it has finished draining.
Spoon the cheese curds from the double boiler into the cheese cloth-lined colander, fold the excess cheese cloth over the curds, and allow the whey to drain into the catch bowl for two hours.
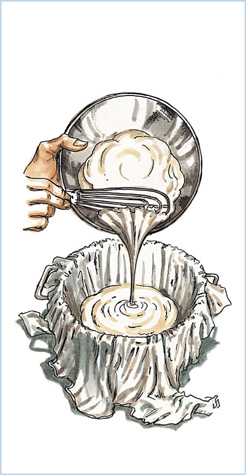
Draining
Discard the whey from the colander, gather the cheese cloth into a ball, and tie off the ends around a wooden spoon. Let the cheese continue to drain, either refrigerated or at room temperature, according to your recipe instructions. Do not touch the whey for eight to twenty-four hours, as your recipe requires.
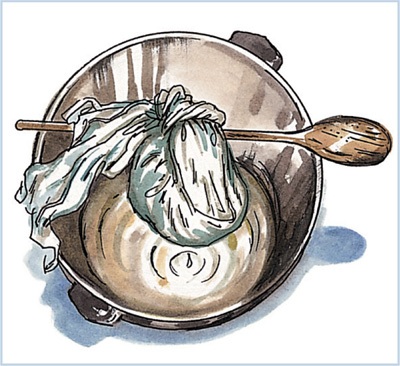
Finishing
After the cheese has drained enough to the desired consistency, remove it from the cheese cloth, roll it into a ball, and place it in a covered plastic container (or spoon into a covered container, depending on the consistency). Refrigerate your cheese for up to two weeks, or for as long as the recipe recommends.
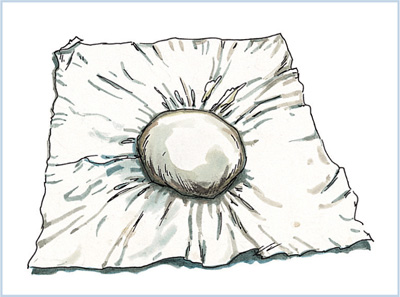
Basic Cheese Recipes
In the recipes that follow, use cow’s milk unless goat’s milk is specified in the recipe. If you prefer the tangy flavor of goat’s milk, it may be substituted for cow’s milk in all of the recipes.
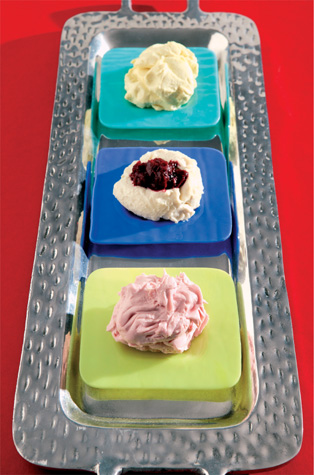
For a festive party or breakfast spread, make yogurt cheese from fruit-flavored yogurts, such as lemon, banana, and strawberry, and serve your cheese garnished with whole-fruit jams, such as sour cherry or blueberry.
Paneer
Paneer is a staple in Indian cooking. Go to any Indian restaurant and you are likely to find Saag Paneer, a scrumptious dish of spinach, curry, ghee, and of course, paneer. Often listed as a cottage cheese, it has a firmer structure that is actually more similar to tofu. Although it is possible to find paneer in specialty markets, the commercial variety tends to have a rubbery texture.
PROCEDURE
Bring milk to a boil over medium heat, being sure to stir frequently so it does not burn or form a skin on the bottom of the pan. When the milk begins to boil, turn down the heat and add the lemon juice or yogurt and stir. The milk should start separating into fluffy white curds and thin, watery whey. If the curds are not forming, add more juice or yogurt until the whey is almost clear.
When the curds start forming, immediately turn off the heat. This is important because the longer the curds stay on the heat the tougher they become. Strain the cheese mixture into a cheese cloth–lined colander, making sure you have a bowl under the colander to catch the whey. Tie the ends of the cheese cloth into a loose ball, and very gently squeeze to remove the additional whey.
Place the cheese ball onto a flat surface, such as a table or a counter-top, and place a heavy weight on top. The best approach is to use a plastic container filled with water. Let it sit out in the open for four hours or until it has a firm consistency.
Yield: 1 pound (450 g)
INGREDIENTS
10 cups (2.4 L) whole milk
6 tablespoons (90 ml) lemon juice or ½ cup (125 grams) yogurt
TECHNIQUES
For tools and illustrated steps, see Techniques for Making Fresh, Soft Cheeses,
page 48
.
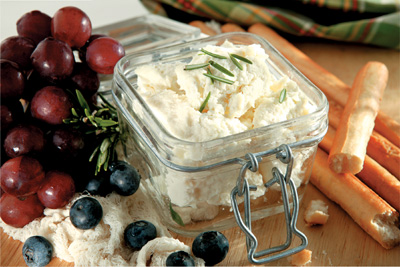
Fresh paneer is easy to make and has a creamy texture that is vastly superior to the denser texture of commercially made paneer.
Saag Paneer
Here is a simple version of Saag Paneer that will allow you to use your homemade cheese. Saag paneer is one of the most popular Indian dishes. Its savory spices blend perfectly with the soft textured cheese, making it a dish that is a treat any time.
INGREDIENTS