Making Artisan Cheese (27 page)
Read Making Artisan Cheese Online
Authors: Tim Smith
Mastering the art of making mold- and bacteria-ripened cheeses, such as the blue cheese shown here, raises cheese making to an edible art form.
TOOLS
Cookingpan, or double boiler
Cheese thermometer
Stainless-steel stirring spoon
Colander
Cheese cloth
catch bowl
Cheese press
curd knife
Cheese board
pH testing strips, or electronic reader
Ripening cave (dedicated refrigerator)
Refrigerator thermostat
Humidistat
Cheese mold
cheese follower
Cheese wax or butter muslin for banding
Two drying mats (plastic or bamboo
sushi mats)
Ripening box (a plastic food-grade box with
sealing lid, or a large zip-close plastic bag)
Catch pan
Cheese film
8” x 8” (20 x 20 cm) baking pan
4 Camembert molds
Techniques
Advancedcheese-Making techniques
CULTURING THE MILK
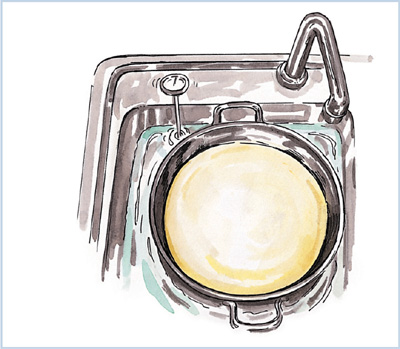
This is the first stage in the cheese-making process, where the starter culture is added to the milk. Also known as acidifying, the procedure entails adding the starter to the milk at the proper temperature and letting the culture grow. It is important to ensure that the milk is at the proper temperature and that the temperature is maintained throughout the process. The best way to do this is to heat the milk in a hot-water bath; the kitchen sink works best. In general, the water needs to be 10° higher than your target temperature, which is called for in the individual recipe.
RENNETING
No matter what type of rennet you use (dry or liquid), it needs to be diluted to ensure that it is distributed evenly throughout the milk. Use ¼ cup (60 ml) of cool, unchlorinated water (read the labels of bottled water to be sure it is unchlorinated), and if you are using rennet tablets, they need sit in the water for forty minutes before use. Before adding the rennet, make sure that the milk is at the proper temperature stated in the recipe. Rennet is effective between 68°F and 122°F (20°C–50°C). When adding the rennet to the milk, stir the milk gently, both in circles as well as from top to bottom, for about 1 minute. If you are using raw milk or non-homogenized milk, you will need to top-stir as well. This entails using your spoon and stirring the top half of the pot. In these types of milk, the cream rises to the top, and top-stirring will ensure a full distribution of rennet. Cover and wait the recommended time, which in most cases is 30 to 40 minutes.
CUTTING THE CURD
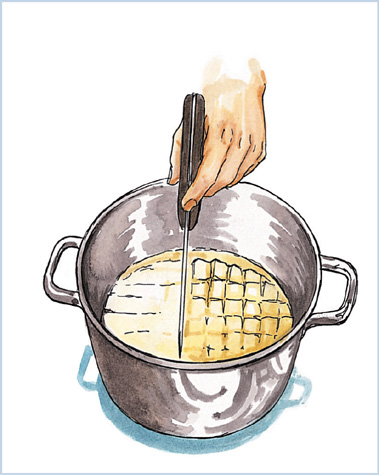
Cutting the curd takes place once the rennet has come to a complete set. The process of cutting is simple: You use your curd knife to cut rows ½" (about 1 cm) apart and across the pot. Next, turn your pot 90 degrees, and using the same spacing, cut at right angles to your original cuts. The final cut is trickier, because you are trying to break the curd into cubes. The best approach is to use your knife to cut through half of the pot at a 45-degree angle. Turn the pot 90 degrees again, and finish cutting so that you have cheese pieces shaped roughly like cubes. When you start cutting, you will notice a tremendous release of whey. This contraction of the curd and the release of the whey is called syneresis. It is important to remember that the size of the curds will have an effect on the texture of the cheese. Smaller curds will result in a drier, firmer cheese, whereas larger curds will create a cheese with a smoother, softer texture.
Draining Curds
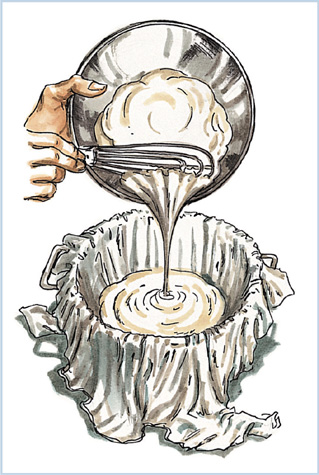
Spoon curds into a colander lined with cheese cloth, and place a catch bowl underneath. Use a piece of cheese cloth that is large enough to cover the cheese when it has finished draining.
Spoon the cheese curds from the double boiler into the cheese cloth–lined colander, fold the excess cheese cloth over the curds, and allow the whey to drain into the catch bowl for 2 hours.
Draining
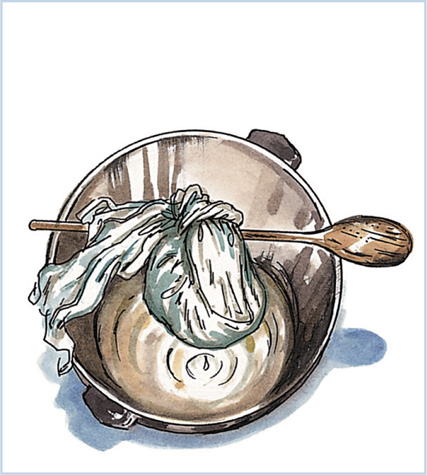
Discard the whey from the colander, gather the cheese cloth into a ball, and tie off the ends around the wooden spoon. Let the cheese continue to drain, either refrigerated or at room temperature, according to your recipe instructions—without touching the whey for 8 to 24 hours, as the recipe specifies.
Pressing between Boards
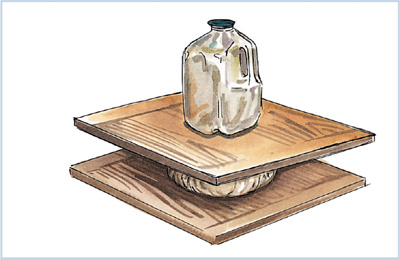
When the whey has stopped draining, place the cheese cloth–wrapped curd mixture on a cheese board. Cover with a second cheese board, and weigh down the cheese by setting a large bottle of water on top. Press the cheese overnight at room temperature.
Salting the Curds
Remove the curds from the cheese cloth, and break them over a bowl into 1" (2.5 cm) pieces. Gently blend salt, as directed in each recipe, into the pieces, taking care not to handle the curds too roughly with your fingers.
Molding and Pressing
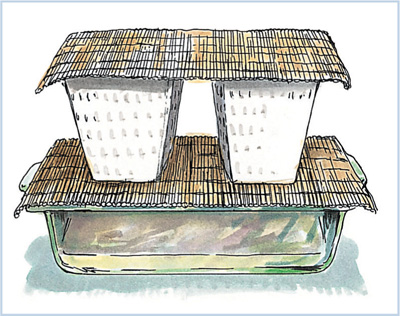
Line the cheese molds with cheese cloth, and place them on top of one of the cheese mats. Place the mat on top of the cake pan. Fill the molds with curds, and place another mat on top of the molds. Turn by placing your hands on both the top and bottom of the cheese mats and turning the ensemble over every fifteen minutes for two hours. Continue to turn the cheeses as directed in the recipe you are following; then age the cheese as directed.
Brining
Some advanced cheeses, such as Blue Gouda (see
page 142
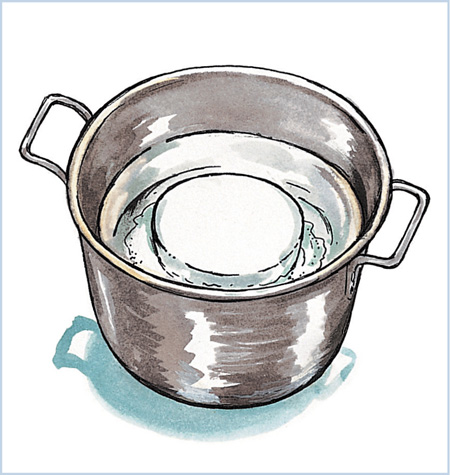
), will need to be soaked in a saltwater solution (2 pounds [about 1 kg] salt to 1 gallon [3.8 L] of water heated to 190°F [88°C]) for a period of time after pressing. Follow the directions in the individual recipes for the length of time to brine the cheese before ripening it.
Aeration for Blueing
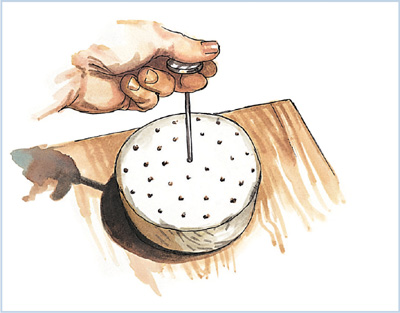
Sterilize a piercing tool (the stem of a milk thermometer works well) by dipping it into boiling water for a minute. Then, poke twenty holes through the top and through the bottom of the wheel of cheese. Set the cheese on a cheese mat, and place it into your ripening box or bag (see
page 150
). Cover and put it into your ripening refrigerator at the temperature, humidity, and length of time called for in the recipe.
Maturation
Some advanced, natural-rind cheeses need to have their rinds wiped with a piece of cheese cloth dipped into saltwater (2 pounds [about 1 kg] salt to 1 gallon [3.8 L] of water heated to 190°F [88°C]) or sprayed with
B. linens
(see
page 170
) during maturation in the refrigerator, as directed in the individual recipes.
