Happy Endings: Finishing the Edges of Your Quilt (26 page)
Read Happy Endings: Finishing the Edges of Your Quilt Online
Authors: Mimi Dietrich
Tags: #Crafts & Hobbies, #Quilts & Quilting
Attaching Covered Cording with Binding
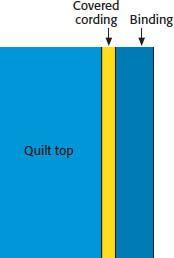
Add a tailored effect to a quilt by sewing a row of covered cording inside the binding edge. This technique adds thickness to the edge of the quilt. When planning, you should add ¼" to the cut width of your binding so that it will turn over the edge. You can trim the edge of the quilt slightly after you apply the binding if it will not fully cover the stitches on the back of the quilt.
1.
Make covered cording, following the preceding directions and using your desired fabric. The cording should be thin, approximately" to ⅛" in diameter, so that it adds just a slim accent to the edge of your quilt.
2.
Baste the quilt layers together (see
page 41
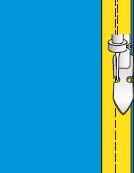
). Sew the cording to the edge of the quilt, using your zipper foot and a long basting stitch. Use the seam allowance you plan for your binding.
3.
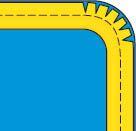
If you are sewing covered cording around a curve, avoid stretching it as you sew. The cording does not have to be eased like binding; just sew it evenly to the edge of the quilt. Clip the cording seam allowance a few times to keep it flat. Do not clip any further than the stitching line.
4.
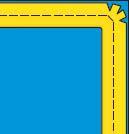
When you approach a corner, stop sewing 1" from the corner. Clip the covered cording seam allowance three or four times near the corner. Continue stitching to the corner. Stop with the needle in the fabric and lift the presser foot. Turn the fabric slightly and take two stitches. Lift the presser foot again and turn the fabric to sew the next side. These two stitches will help the corner look sharp.
5.
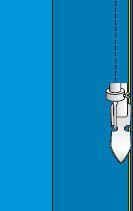
To end the cording, see step 3, below right. Then apply the binding on top of the cording, using your zipper foot.
6.
As you turn the binding to the back of the quilt, the cording will appear between the quilt and the binding. Before you sew the binding on the back of the quilt, inspect your cording carefully. You might need to resew the binding in a few spots to cover the cording stitches.

Attaching Covered Cording without Binding
Because no binding will be attached in this method, the covered cording will stand alone as a narrow finish on the edge of your quilt.
1.
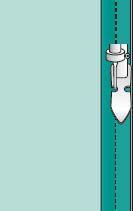
Place the covered cording along the edge of the quilt top, matching the cut edge of the cording with the cut edge of the quilt. Using a zipper foot, sew the cording to the quilt top (not to the batting or backing) using a ¼" seam allowance.
2.
If you need to sew around a curve or corner, refer to step 4, above left.
3.
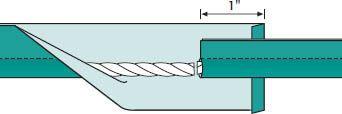
When you approach the starting point, cut the covered cording so that the two tails overlap 1". Open the stitches on one tail and cut off 1" of just the cording, not the fabric covering. Turn the cut edge of this fabric covering under ¼", either straight or diagonally. Insert the beginning tail, refold the fabric to cover all raw edges, and continue the seam.
4.
Sew the front and back of the quilt together by machine, referring to “Attaching Special Finishes” on
page 55
. Continue to use a zipper foot, which will ride easily next to the cording thickness and position your stitches correctly. If you sew with the front of the quilt on top, you will be able to see your previous stitches. Sew to the left of these stitches to hide them in the seam of the finished quilt.
Adding Flat Piping
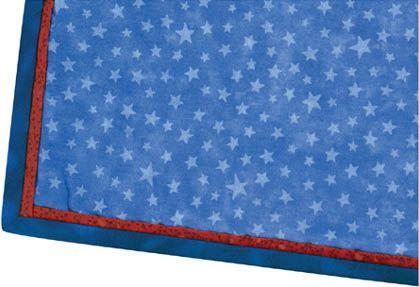
Flat piping is also used to add a hint of an accent color to the edge of the quilt between the quilt top and the binding.
1.
Cut enough 1"-wide strips of accent fabric to go around the outside of the quilt. Piece them together using a diagonal seam (see
page 35
) so that you have one strip for each side of the quilt.
2.
Fold the strips in half lengthwise, wrong sides together, and position them so that the raw edges are aligned with the quilt edges. Baste the strips to the quilt edges using a scant ¼" seam allowance. Overlap the strips in the corners.