Happy Endings: Finishing the Edges of Your Quilt (30 page)
Read Happy Endings: Finishing the Edges of Your Quilt Online
Authors: Mimi Dietrich
Tags: #Crafts & Hobbies, #Quilts & Quilting

7.
To finish sewing your quilt together, refer “Attaching Special Finishes” on
page 55
.

Making Your Own Ruffles
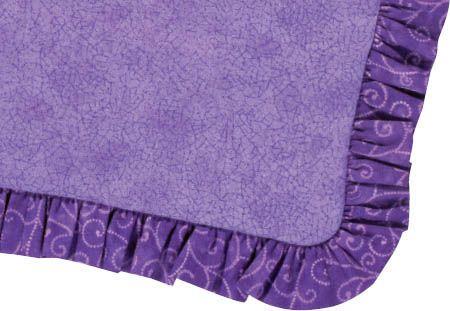
For a perfect match, make your own ruffles to coordinate with the fabrics and colors in your quilt. Fabric ruffles can be cut on the bias or straight grain of the fabric. Cut the fabric strips twice the width of the finished ruffle, plus two seam allowances. For example, if you want a 2"-wide finished ruffle, cut 4½"-wide strips (2" for the front, 2" for the back, and two ¼" seam allowances). By making a doubled ruffle, it will be just as pretty on the back of the quilt as it is on the front. Plus, you won’t have to sew a long hem on the outer edge of the ruffle.
You’ll need enough fabric strips to make a continuous strip that is at least twice the distance around your quilt. As an example, a 36"-square baby quilt measures 4 yards around the perimeter. To make a nice, full ruffle for that quilt, you need to cut 8 yards of fabric strips. That’s not 8 yards of fabric, but strips that will be 8 yards long when sewn together end to end.
1.
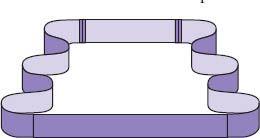
Stitch the fabric strips together to make one long strip. Unlike joining binding strips, it’s best to sew a perpendicular seam across the end of the strips, as shown, rather than diagonally. With right sides together, sew the strips using ¼" seams. Press the seams open to distribute the thickness of the seam. When all strips are sewn together, join the two ends to make a continuous loop.

2.
Fold the ruffle in half, wrong sides together, so that the cut edges are aligned. Press the fold with a steam iron to help the layers stay together.

3.
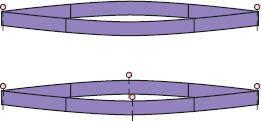
Fold the length, to divide it in half, and mark these points with pins. Fold each section in half again to divide the strip into quarters, and mark these points with pins. These marks will be used to position the ruffle evenly on the quilt.

4.
To gather the ruffle, sew two parallel lines of machine basting stitches ⅛" and ⅜" from the cut edges of the ruffle. Gather the ruffle by pulling the bobbin threads—and praying that they don’t break! Gather each quarter of the ruffle separately to prevent breaking the threads. (See the accompanying “Happy Ending Hint,” opposite.)

Happy Ending Hint
Here’s a great way to gather ruffles—and you don’t have to worry about your bobbin thread breaking. It’s especially helpful for yards of ruffles, where the chance of breaking a thread is pretty high.
Set your sewing machine for the longest, widest zigzag stitch it will make. Lay a piece of pearl cotton, crochet cotton, or even dental floss ⅛" from the cut edges of the ruffle. Zigzag over this thread, being careful not to stitch into it. When you are finished, this thread can be pulled easily to gather the ruffle. Just be sure to anchor one end of the thread so that you don’t accidentally pull it out from under the zigzag stitches.
5.
Gather the ruffle to fit the edge of your quilt. The four pins placed along the ruffle can be matched to the centers of the quilt sides. For a large quilt, you can divide the ruffle length again to make it easier to handle. Distribute the fullness evenly along the edge, but add extra gathers for 1" on each side of the corners to allow the ruffle to lie flat when it is turned out (see
page 65
, step 3).
6.
Sew the ruffle to the edges of the quilt top with a ¼" seam allowance. To finish sewing your quilt together, refer to “Attaching Special Finishes” on
page 55
.

Final Touches
Ah, your project is quilted and the edges are bound—it’s finished! But before you turn off the machine and close the sewing room door behind you, there are a couple of things you may want to add to your special quilt
.
Quilt Labels
You’ve finished your quilt by sewing the last 3" of binding securely, and you can’t wait to take it upstairs and fling it on the bed to admire its total beauty!


