Happy Endings: Finishing the Edges of Your Quilt (32 page)
Read Happy Endings: Finishing the Edges of Your Quilt Online
Authors: Mimi Dietrich
Tags: #Crafts & Hobbies, #Quilts & Quilting
Method Two
If you already stitched the binding on your quilt, you can still sew a hanging sleeve to the back.
1.
Follow steps 1 and 2 on
page 69
to prepare the strip for the sleeve.
2.
Fold the sleeve, wrong sides together, match the long sides, and sew a ¼" seam.

3.
Arrange the seam in the center of the strip and press the seam open to distribute the thickness of the seam allowance.

4.
Place the hanging sleeve on the back of the quilt, just under the binding at the top of the quilt. The seam allowance will be hidden against the back of the quilt.

5.
Slip-stitch the edges of the hanging sleeve to the back of the quilt.

Stitching Guide
I’ve included a guide to hand and machine stitches that will help you find the appropriate stitches for your project
.
Hand Stitches
You can use hand stitches to sew patchwork or appliqué designs, to stitch the front and back of the quilt together, to connect binding strips, to make covered cording, or to sew the binding to your quilt. Use a secure running stitch to sew the layers of fabric together.
1.
Cut a single strand of thread about 18" long and tie a knot in one end.
2.
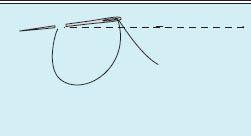
Using a Sharp or milliner’s needle, or a Between if you prefer a shorter needle, take two or three short running stitches at a time, sewing in and out through the layers of fabric to hold them together. Make a small backstitch every 2" to strengthen the running stitches. End your stitches by sewing two small backstitches, bringing the needle through the loop to secure your thread.

Quilting Stitches
Quilting stitches are short running stitches used to sew the front, batting, and back of your quilt together.
1.
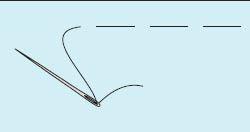
Thread a Between quilting needle with an 18" length of hand-quilting thread and tie a single knot in the long end of the thread. Insert the needle through the top layer of the quilt about ¾" away from the point where you want to start stitching. Slide the needle through the batting layer and bring the needle out at the starting point.
2.
Gently tug on the thread until the knot pops through the fabric and is buried in the batting. Take a backstitch and begin quilting, making a small running stitch that goes through all three layers. Take two, three, or four stitches at a time, trying to keep them straight and even.
3.
To end a line of quilting, make a single knot approximately ¼" from your quilt top. Take one more backstitch into your quilt, tugging the knot into the batting layer and bringing the needle out ¾" away from your stitches. Clip the thread and let the end disappear into your quilt.

Basting Stitches
Basting stitches are used to hold layers of fabric together while you sew the final seam. They are usually removed after the seam has been sewn. Basting stitches are long running stitches, stitched with the “ins” and “outs” approximately 1" apart. They are usually stitched one or two stitches at a time. You do not need to make knots or backstitches because you want these stitches to be easy to remove later.

Finishing Stitches
Use the blind stitch—sometimes called the appliqué stitch—and the slip stitch—sometimes called the ladder stitch—to finish the front and back of the quilt without binding, after turning the back of the quilt to finish the front of the quilt, or after applying binding or special finishings. These stitches are invisible when your quilt is finished.
Use the following suggestions regarding needles and threads for a perfect finish to your edge treatment:
Use a Sharp or milliner’s needle, or use a Between if you prefer a shorter needle.
Start with a single strand of thread approximately 18" long and tie a knot in the long end.
