Happy Endings: Finishing the Edges of Your Quilt (14 page)
Read Happy Endings: Finishing the Edges of Your Quilt Online
Authors: Mimi Dietrich
Tags: #Crafts & Hobbies, #Quilts & Quilting
3.
If you are using a square, fold the square in half diagonally and press lightly. Cut along this fold to create two triangles. Place sides A and B right sides together as shown so that the points where the triangles intersect are ¼" from the cut edges. Sew the triangles together using a ¼" seam allowance and a stitch length of 12 to 15 stitches per inch. Press the seam open.
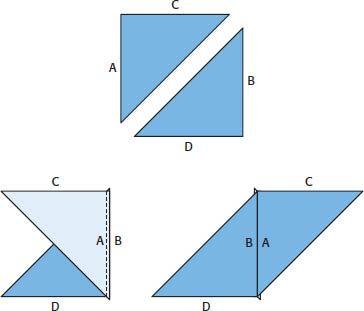
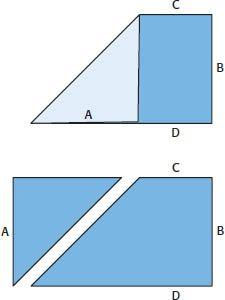
If you are using a rectangle, fold side A down to match side D. Press this diagonal fold lightly and cut along the fold line to create the bias edges.
4.
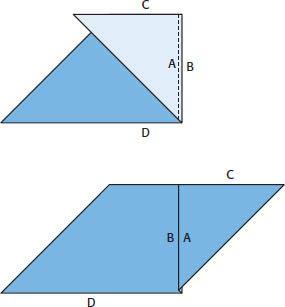
Place sides A and B right sides together and sew a ¼" seam, using 12 to 15 stitches per inch. Press the seam open and place the fabric on a flat surface.
5.
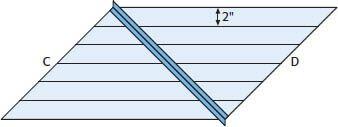
Whether you started with a square or a rectangle, you now have a parallelogram. For either piece, start on one unmarked side and draw a parallel line 2" (the binding width) from the bias edge. Continue drawing parallel lines 2" apart across the whole piece of fabric. Be careful not to stretch your fabric as you draw the lines. Trim off the fabric at the end if it is less than 2".
6.
Bring sides C and D right sides together to create a tube of fabric. Shift one edge of C so that it matches the first line marked on D. At the other end, the end of D will match the last line on C. Pin the edges together and then stitch a ¼" seam. It may seem a little awkward because the fabric will not lie flat. Don’t worry; that means you’ve aligned it correctly! Press the seam open.
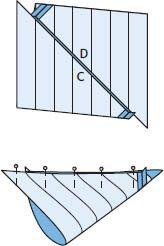
7.
Using scissors and beginning at one uneven end, start cutting along the marked line. When you get to the seam, you will have moved down one line and can continue to cut enough binding for your quilt.
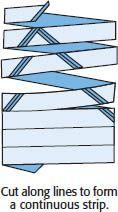

Happy Ending Hint
When making continuous binding for a large quilt, place the binding tube over your ironing board. Keep turning the tube of fabric as you cut the binding.
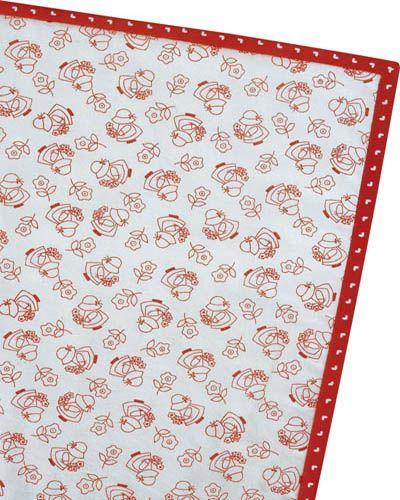
Cutting Special Fabrics for Bindings
Fabrics with small, evenly spaced designs can create very special bindings for your quilt. Designs repeated in straight or diagonal patterns can be cut into straight or bias strips to highlight the printed design in the binding. A row of small flowers or hearts can be lined up along the edge of your quilt to add the perfect touch.
Plaids and stripes also make terrific bindings. You can cut them on the straight of grain or on the bias, depending on the look you’d like for your quilt.
Small Prints
If you’d like to have the print design show evenly on both the front and back of your quilt, you’ll have to plan how to cut your strips, rather than just cut one 2"-wide strip after the other. You may need to trim off some of the fabric before cutting the next binding strip so that you can center the design as needed.
For single-fold binding, you’ll need to have four repeats of the design to have finished binding with a single row of motifs on the front and on the back. (Remember, the edges will be taken up in the seam allowances.)
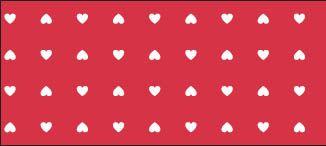
For double-fold binding, you’ll need to have six repeats of the design for one row to show on the front and one row on the back. That’s because with double-fold binding the finished binding width is roughly one-sixth of the cut size.

